
“Export in the highest resolution with the newest codec” sounds like sensible advice. For Shorts, Reels and TikTok, it's incomplete. A file can look excellent in your editor and still arrive on viewers' phones with softened captions, uneven motion or altered colours.
The best quality video formats are the ones that preserve the intended picture through upload, platform processing and playback. That makes compatibility and post-upload inspection just as important as compression efficiency. Start with a dependable export, then change it only when a controlled comparison shows a benefit.
Export Settings for Vertical Video at a Glance
| Setting | Recommended value | Reference basis |
|---|---|---|
| Container | MP4 | YouTube recommendation |
| Codec | H.264/AVC | Broad compatibility across platforms and editors |
| Scan | Progressive | YouTube recommendation |
| Chroma subsampling | 4:2:0 | YouTube recommendation |
| Default resolution | 1080 x 1920, vertical 9:16 | Portrait orientation of an HD frame |
| Optional 4K master | 2160 x 3840 | Portrait orientation of a UHD frame |
| Frame rate | Match the source | Avoid unnecessary frame conversion |
| 1080p at 24–30 fps | 8 Mbps | YouTube SDR reference bitrate |
| 1080p at 48–60 fps | 12 Mbps | YouTube SDR reference bitrate |
| 4K at 24–30 fps | 35–45 Mbps | YouTube SDR reference bitrate |
| 4K at 48–60 fps | 53–68 Mbps | YouTube SDR reference bitrate |
| Rate control | 2-pass VBR when available | YouTube encoding recommendation |
| Audio | AAC stereo | Practical delivery default |
The bitrate values and encoding settings in this table follow YouTube's recommended upload settings, with its resolution classes arranged vertically for short-form production. Treat them as YouTube upload references, not universal requirements imposed by TikTok or Instagram.
For an ordinary vertical story, select the default HD portrait frame and H.264 in an MP4 container. Keep the source frame rate rather than increasing it to make the export appear more polished. A higher output frame rate won't recover motion that wasn't captured or generated.
Apply the preset without overcomplicating it
Choose variable bitrate, preferably with a two-pass option when your editor offers it. This lets the encoder allocate more data to difficult passages, such as moving illustrations or abrupt scene changes, instead of treating every moment identically.
Use AAC stereo for a straightforward delivery file. Keep a larger master only when your source material contains useful extra detail or you expect to reframe it later. Upscaling a soft image doesn't create a more detailed original.
Check YouTube video specifications when preparing a channel-specific upload. For advertising placements, Rapid Ads' creative sizing guidance for media buyers is useful for checking composition and placement requirements separately from encoding.
Before exporting a complete batch, make a short test containing your most demanding scene. Include subtitles, movement and a dark gradient. Inspect the export at phone size, then magnify the caption edges: the preset is a starting point, not proof that every scene has enough bitrate.
Why Resolution Alone Does Not Decide Quality
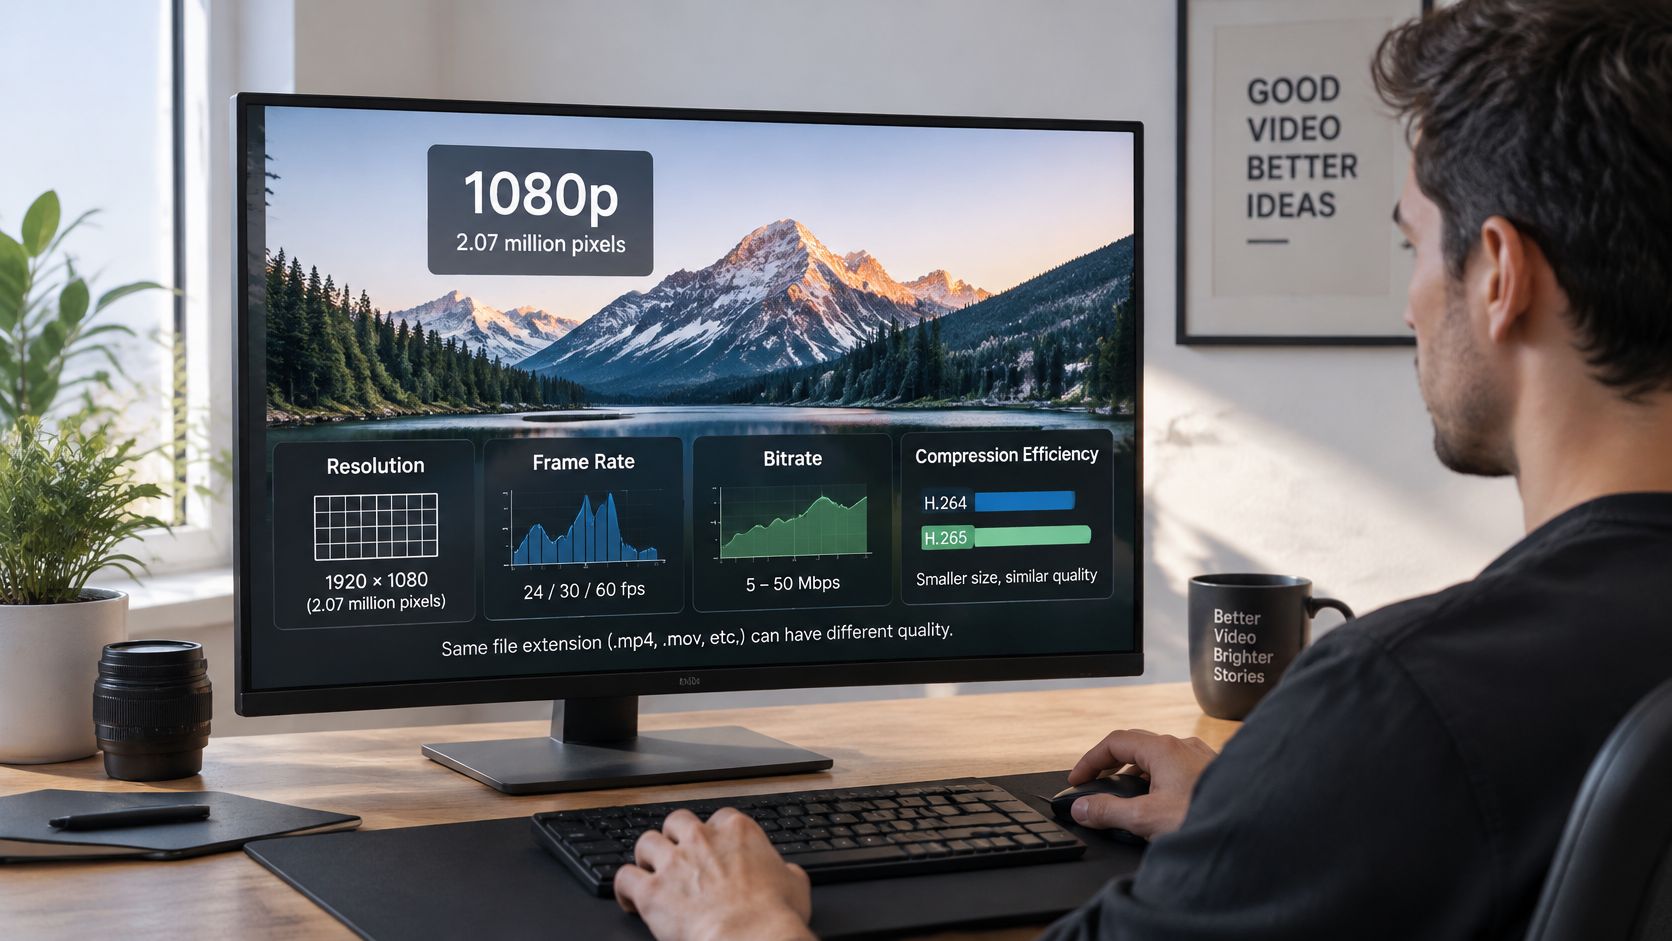
Resolution describes the frame's dimensions, not how faithfully the encoder preserves it. Picture quality also depends on frame rate, bitrate and compression efficiency. A larger frame gives the encoder more image information to represent, but it doesn't guarantee that the available data budget is sufficient.
The International Telecommunication Union's video-quality report identifies HDTV as 1,920 × 1,080 pixels and consumer UHD as 3,840 × 2,160 pixels. Those dimensions work out to approximately 2.07 million and 8.29 million pixels per frame, respectively, so UHD contains four times as many pixels. Swapping width and height for a portrait frame leaves that pixel count unchanged, although cropping a wide-format composition to fill a portrait canvas is a different operation and can discard content.
Separate spatial detail from motion detail
A close-up product demonstration benefits from clearly resolved edges and textures. A dance clip or rapid camera pan also needs sufficient temporal detail: more distinct source frames can make movement look smoother.
Matching the source matters more than choosing the largest frame-rate number in the export menu. Repeating existing frames won't provide the same result as capturing additional moments of movement. Unnecessary conversion can also introduce an uneven cadence.
Bitrate is the encoder's data budget. When it's too constrained, the encoder has to simplify the picture more aggressively. Fine lettering, textured backgrounds and subtle gradients are useful inspection targets because damage there is easy to overlook during normal playback.
Test the difficult transition
Say a generated story cuts from a quiet bedroom illustration to rain moving across a window. A subtitle appears during the cut. At an overly restrictive bitrate, the background and text compete for limited data, and the subtitle may briefly look smeared even though it becomes clear once the scene settles.
Pause at that transition rather than judging only a still opening frame. If increasing the bitrate improves the exported transition, compression was part of the problem. If the source illustration or subtitle is already soft, changing the export can't restore missing detail.
The best-looking file matches the source frame rate and carries enough bitrate for the detail in its frames.
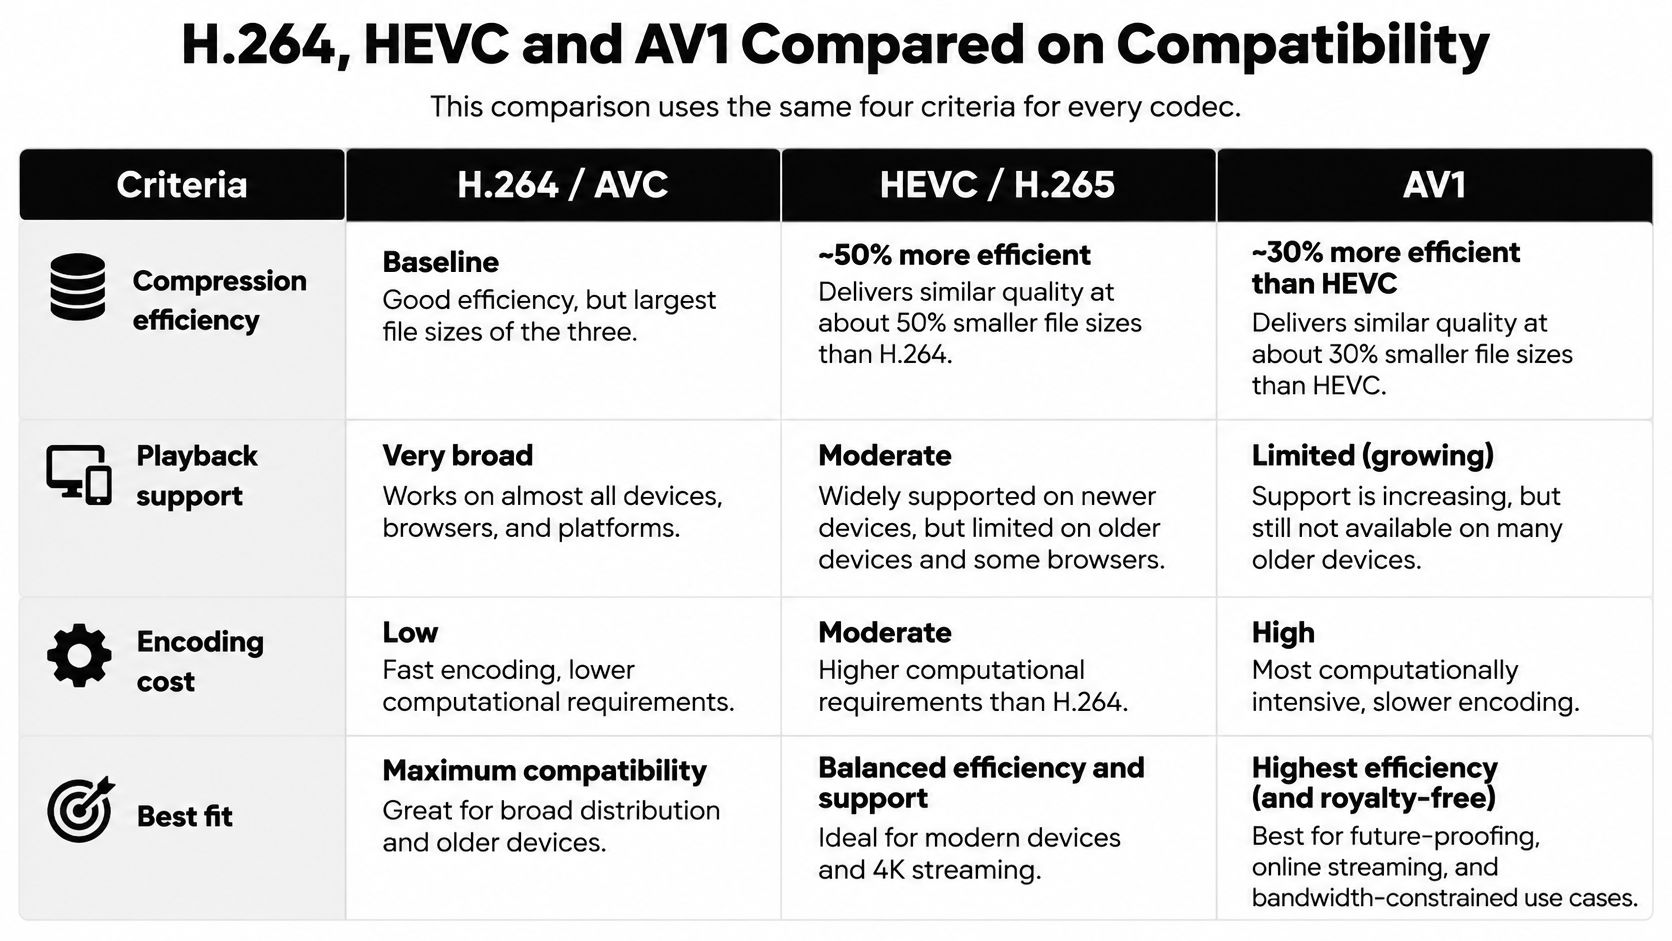
H.264, HEVC and AV1 Compared on Compatibility
| Codec | Compression efficiency | Playback support | Encoding cost | Best fit |
|---|---|---|---|---|
| H.264/AVC | Practical reference point | Mature device, browser and editor support | Usually the least demanding starting point | A broadly compatible social upload master |
| HEVC/H.265 | Better compression potential than H.264 | Check the intended device and application | Typically more demanding than H.264 | Controlled delivery, especially compatible HDR workflows |
| AV1 | Strong compression potential | Requires closer hardware and application checks | Often the most demanding software encode | Tested delivery derivatives where bandwidth matters |
These are workflow comparisons, not fixed rankings for every encoder. Hardware acceleration, quality presets and the implementation in your editing software can change encoding time substantially. Compare actual exports before making throughput assumptions.
H.264 is the compatibility baseline
H.264's advantage isn't novelty. It's the accumulated support around the format. Forasoft's H.264 history dates its approval to 2003 and cites Fraunhofer's statement that H.264/MPEG-4 AVC is used in more than 1 billion devices.
For compression efficiency, use it as the baseline against which you test alternatives. For playback support, it's a sensible first choice when the destination includes unfamiliar editors, client review software and mixed devices. For encoding cost, established hardware encoders often make it convenient, though you should still inspect their output rather than assume every preset is equivalent.
Its best fit is a delivery master that needs to move through several people's tools without negotiation.
HEVC is useful when the receiving chain is known
HEVC can preserve comparable detail with less data than H.264, but the practical question is whether the receiving application can decode and edit it reliably. A device's ability to play a file doesn't necessarily mean a client's editing workflow will handle that file comfortably.
Evaluate encoding cost using your actual workstation. A hardware-supported HEVC export may be convenient; a software-only workflow may take longer than your publishing schedule allows. Choose it when the storage or delivery benefit survives both picture inspection and compatibility testing.
AV1 needs a delivery reason
AV1 is attractive when compression savings matter across repeated playback. Its support and encoding requirements deserve more scrutiny than the filename alone suggests.
Consider identical portrait clips exported in H.264 and AV1 at comparable visual quality. The AV1 version may be smaller, but that doesn't establish which file is more useful to a client. H.264 is more likely to fit an established editing workflow, although no codec is guaranteed to open in every editor.
The distinction is operational: efficiency reduces data requirements; compatibility reduces handoff failures. For a creator delivering a single social upload, avoiding a failed handoff can matter more than reducing the upload's size.
MP4, MOV and Platform Upload Limits
MP4 and MOV are containers, not quality settings. A container packages video, audio and related information. The codec determines how the video stream inside it is compressed.
An MP4 file commonly carries H.264 video and AAC audio. MOV, the QuickTime container often encountered in Apple-oriented workflows, can carry H.264 too. If both contain the same encoded video stream, changing the container doesn't improve or degrade that picture.
Remux before you re-encode
If an editor produces a compatible H.264 MOV and the destination calls for MP4, consider remuxing. A tool such as FFmpeg can copy supported video and audio streams into another container without encoding them again.
Check the streams first. Remuxing doesn't turn an unsupported codec into a supported one, and some metadata or audio arrangements may need attention. Afterward, play the beginning, middle and end of the resulting file and verify audio synchronisation.
Practical rule: Change the container without re-encoding when the streams already meet the destination's requirements.
Check acceptance separately from quality
Maximum duration, file size and available upload routes can differ between platforms and accounts. Check the current upload interface before rendering a batch rather than treating an older specifications chart as permanent.
For a hypothetical storage estimate, multiply the chosen video bitrate by the clip duration and convert bits to bytes. Audio and container overhead increase the final file size, while variable-bitrate encoding means the result may not exactly match a simple estimate.
Record a small acceptance checklist:
- Duration: Confirm that the finished clip fits the current destination limit.
- File size: Check the actual exported file, not only the editor's estimate.
- Upload route: Verify that the app, browser or scheduling integration accepts the format.
- Processing result: Confirm that acceptance was followed by successful playback.
A short-story pacing target isn't a platform rule. Keep those decisions separate so editorial choices don't accidentally become upload failures.
How Platform Recompression Changes Your Export
The local export isn't the final quality your audience sees. Social platforms process uploaded files into playback versions, so an attractive original is only the input to another encoding step.
Codec adoption also explains why the newest option isn't automatically the safest upload choice. The Streaming Learning Center's discussion of Bitmovin's streaming report reports H.264 in 79% of streaming workflows, compared with 49% for HEVC. Those are streaming-workflow adoption figures, not platform-specific upload acceptance rates.
Compare the processed result fairly
Use private, unlisted or otherwise restricted visibility where the platform supports it. Wait until processing finishes, then inspect the actual playback version at a consistent quality setting.
If the platform provides access to a processed copy, compare that with the original. Don't assume every download button returns the viewer-facing transcode: some tools return the uploaded original or a separately prepared download.
Check the same difficult passages in both versions:
- Dark gradients: Look for new bands or blocky patches in shadows.
- Illustration colours: Check whether saturation and contrast remain intentional.
- Caption edges: Inspect outlines during movement and scene changes.
- Voiceover: Listen for level changes, clipping and reduced intelligibility against music.
When adjusting file size, use a controlled MP4 compression workflow rather than repeatedly saving an already compressed export.
Use SDR unless HDR has a verified purpose
HDR isn't a more vivid export preset. Streaming Media Global's codec-market coverage discusses 10-bit-capable codecs in HDR delivery and HEVC's role in efficient HDR workflows. A compatible codec is only part of the chain; grading, metadata, platform processing and the viewing display must also agree.
For broadly distributed narrative clips, SDR, 8-bit H.264 with AAC audio is a conservative starting point. Use HDR when you can verify the complete production and viewing path, including the platform's processed output. An export that looks vivid on your own HDR display can still be an unreliable delivery choice elsewhere.
Captions deserve their own design pass. Increase text size when needed, use a contrasting outline or background, and leave space around frame edges and interface overlays. Test at normal phone viewing size rather than relying on a magnified editor preview.
The right export is the one that still looks correct after the platform has finished processing it.
When a Newer Codec Earns Its Place
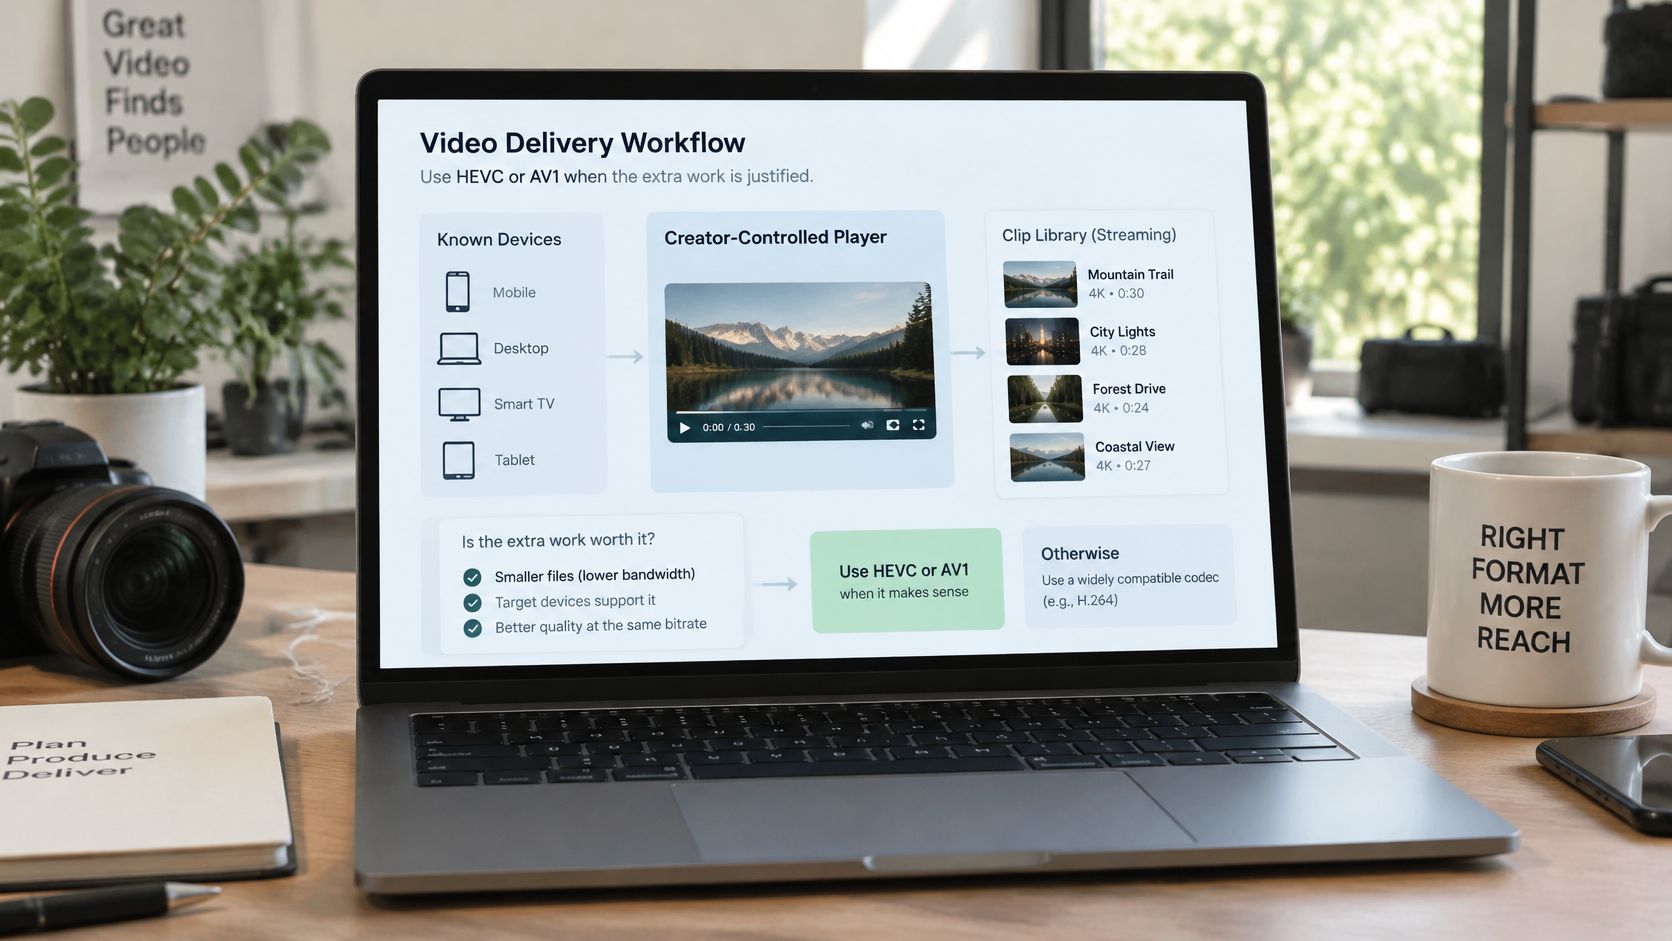
HEVC or AV1 deserves the extra work when you control the playback environment, distribute to known devices or repeatedly stream the same catalogue. In those situations, reduced delivery bitrate can repay additional encoding and testing effort.
Use a separate delivery branch rather than replacing a dependable upload workflow immediately.
YouTube's live-encoding guidance recommends 6 Mbps for AV1/H.265 versus 9 Mbps for H.264 at 1080p and 60 fps, and 35 Mbps versus 50 Mbps at 4K and 60 fps. These are live-streaming recommendations, not upload-export targets or a promise that every encoded clip will achieve the same quality difference.
That distinction matters. A repeatedly delivered stream can benefit each time less data crosses the network. A one-off upload mainly benefits during transfer to the platform; the platform still determines the versions it serves afterward.
Keep a clean source and measure derivatives
Retain the highest-quality source master you can reasonably store. Generate a broadly compatible H.264 MP4 upload copy, then create an HEVC or AV1 derivative only for a destination with a demonstrated need.
Compare alternatives in two ways. At equal bitrate, judge which preserves captions, textures and movement better. At comparable visual quality, measure the resulting file sizes and record encoding time. Don't call a smaller file an improvement if its gradients or subtitle edges are visibly worse.
This video provides an additional visual reference for the codec discussion.

For a freelancer publishing across social platforms, faster client approval and predictable processing may outweigh a smaller delivery file. For an educator hosting a frequently watched lesson library in a controlled player, the balance may favour a newer codec after testing.
Before adding another format, answer these questions:
- Playback control: Do I control the player or know the receiving devices?
- Repeated delivery: Will this file be streamed often enough for bandwidth savings to matter?
- Device validation: Have I checked decoding, seeking, colour and audio on the actual target hardware?
If those answers are uncertain, keep the newer codec as an experiment rather than a publishing dependency.
How to Export, Caption and Auto-Post Your Video
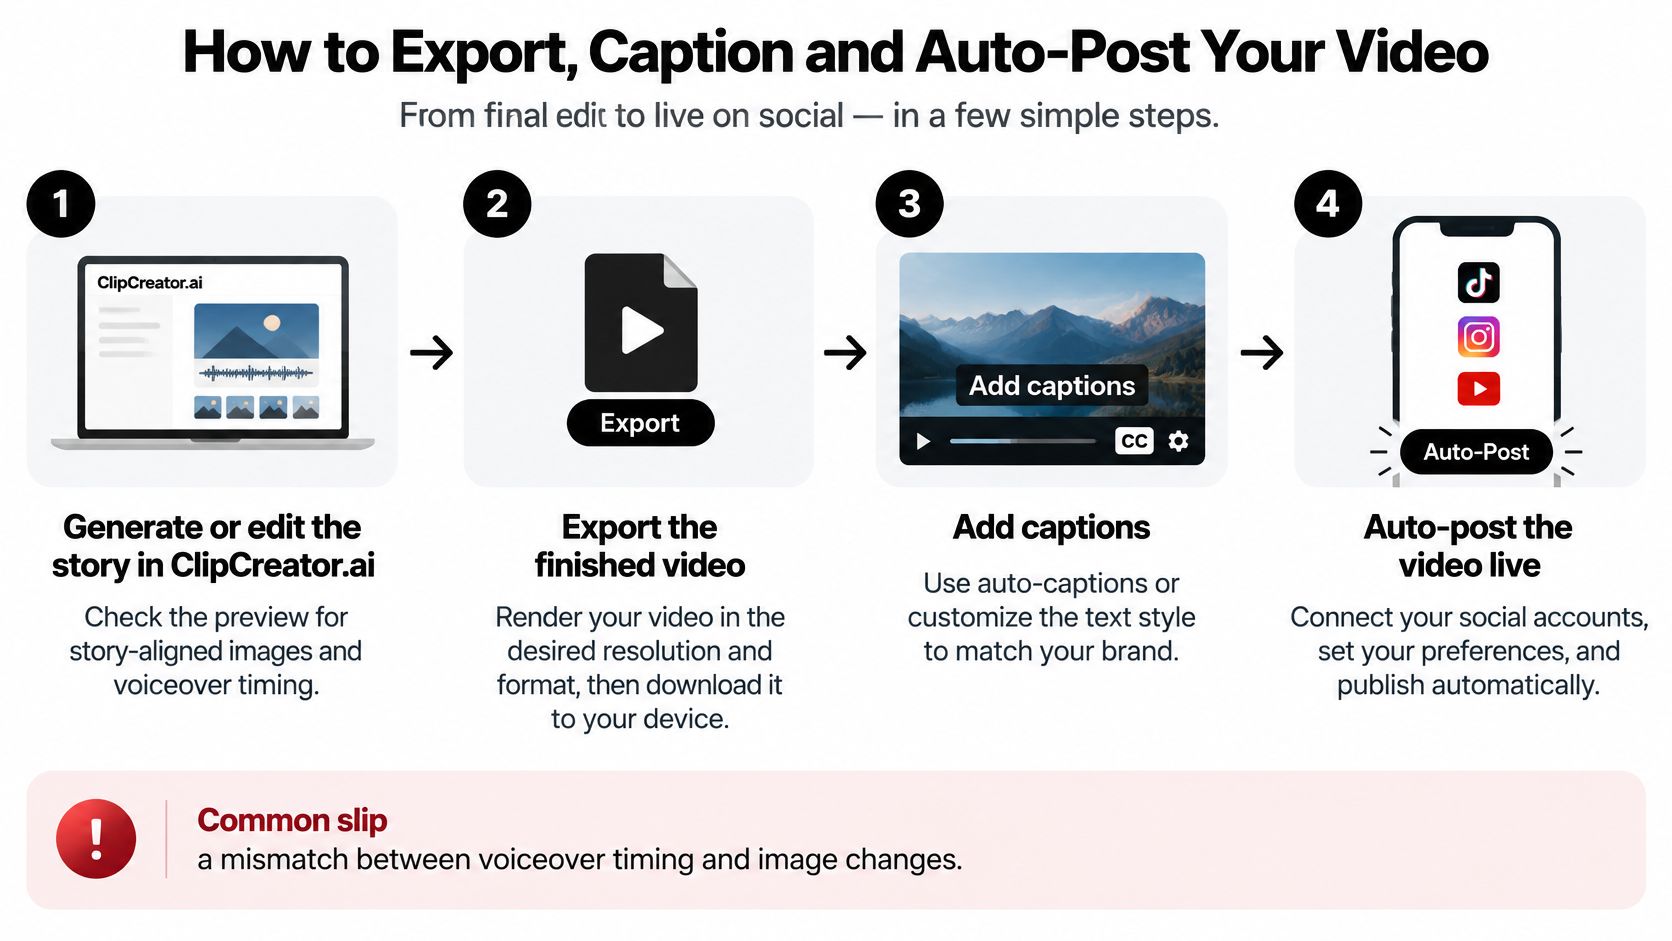
A successful automated workflow needs a review gate before publishing. Automation can generate and distribute the file, but someone still needs to decide whether the images, narration and captions communicate the same story.
Use this visual workflow as a production checklist.
Prepare the story and delivery file
- Generate or edit the story in ClipCreator.ai.Our automatically generated images follow the story closely, but review the preview for image changes that arrive before or after the relevant narration. A scene can be attractive and still communicate the wrong moment. The common slip is approving the pictures without listening to the voiceover alongside them.
- Confirm the portrait canvas and destination requirements.Inspect the downloaded file's dimensions and duration rather than assuming the preview proves compliance. Our videos are up to 90 seconds long, with exact length varying according to the script and voiceover. Check that the finished duration is accepted by each intended destination; don't treat the product's maximum length as a platform rule.
- Preserve the source cadence and choose the export preset.If you're re-editing a download in Premiere Pro, DaVinci Resolve or another editor, match the project and output frame rates to the source. Use the appropriate bitrate reference from the settings table rather than choosing the smallest-file preset. A common mistake is introducing frame conversion during a final branding edit.
Review captions before scheduling
- Inspect the automatic subtitles.We add subtitles automatically, but review their timing, spelling and placement before publication. Pause at scene changes and long phrases, then watch continuously at phone size. Look for clipped words, weak contrast over dark illustrations and captions that overlap platform controls.
- Edit the title and caption for the destination.We let users edit both. Make sure the title accurately describes the story and the accompanying caption suits the platform rather than carrying over unrelated instructions or a previous post's wording. Check names and specialist terms against the narration, especially in educational clips.
- Choose automatic or manual publishing last.We support automatic publication to TikTok and YouTube. Follow the social account connection guidance, verify the destination account and choose the publishing days and times deliberately. You can also download any generated video and publish it manually to any social network, which is useful when a destination requires settings you want to inspect yourself.
Don't assume the creation tool exposes every advanced encoder control. If you need a different codec, bitrate or colour workflow, inspect the downloaded file and make that derivative in a suitable editor.
After publication, check the live result rather than stopping at a successful scheduling message. The acceptance criteria are practical: readable captions, smooth intended motion, a steady voiceover level and playback without an upload or processing warning.
Choose Your Master Format Before You Export
| Situation | Export as | Reason |
|---|---|---|
| Single video for TikTok, Shorts and Reels | Portrait HD H.264 MP4 at the appropriate reference bitrate | A practical compatibility-first delivery choice |
| High-motion clip | H.264 MP4 matching the genuine source frame rate, with the higher applicable bitrate | Preserves motion without unnecessary conversion |
| Known devices with bandwidth limits | H.264 upload master plus a tested AV1 or HEVC copy | Makes delivery savings conditional on successful playback |
| Long-term archive | Highest-quality source master you can store, plus an upload copy | Retains a clean starting point for future versions |
| HDR source | SDR delivery unless the complete HDR chain is verified | Reduces unpredictable colour conversion |
Commit to one platform-safe upload master, while retaining the cleaner source material for future work. Derive specialised versions from that source rather than independently tweaking exports until nobody knows which file is authoritative.
Run a representative test before scaling the workflow. Include a difficult cut, a dark scene, captions and voiceover. Upload with restricted visibility where available, inspect the processed playback and obtain a processed copy when the platform makes one accessible.
Change only what the test identifies
If text softens, investigate bitrate and caption design. If colours shift, inspect the colour-management path before raising resolution. If motion becomes uneven, check cadence rather than assuming a newer codec will fix it.
Keep audio decisions separate from video codec selection. Vid Kraken's guide to choosing MP3 or M4A for YouTube provides context for extracted-audio formats, but that's a different task from choosing the audio stream inside your upload master.
Once the processed result passes inspection, save the preset and repeat the same review standard across scheduled posts.
ClipCreator.ai creates short narrative videos with story-aligned images, voiceovers and automatic subtitles, with downloads for manual publishing or automatic posting to TikTok and YouTube. Visit ClipCreator.ai to create a video, inspect its processed upload and establish a repeatable quality check before scheduling your next batch.

Create your first video in under 2 minutes
Pick a niche, and ClipCreator.ai generates and auto-posts faceless videos to your channels every day.
Join ClipCreator.ai