You've probably seen this happen. A simple clip of coffee brewing, a desk setup coming together, clouds rolling over a city, or a sketch turning into a finished illustration gets more attention than a heavily edited talking-head post.
That's not an accident.
A good time lapse application turns slow change into fast payoff. For short-form creators, that matters because payoff is what stops the scroll. And if you make faceless videos, time-lapse footage does even more. It gives you reusable visual material that can anchor multiple posts without forcing you on camera every day.
Most guides stop at “put your phone on a tripod and hit record.” That's useful, but it's not enough if your goal is scale. A significant advantage comes when you treat time-lapse as a repeatable asset. One capture session can become B-roll for tutorials, product videos, listicles, educational clips, and narrative shorts. That's where the format starts pulling substantial weight in an automated workflow.
What Is a Time-Lapse Video
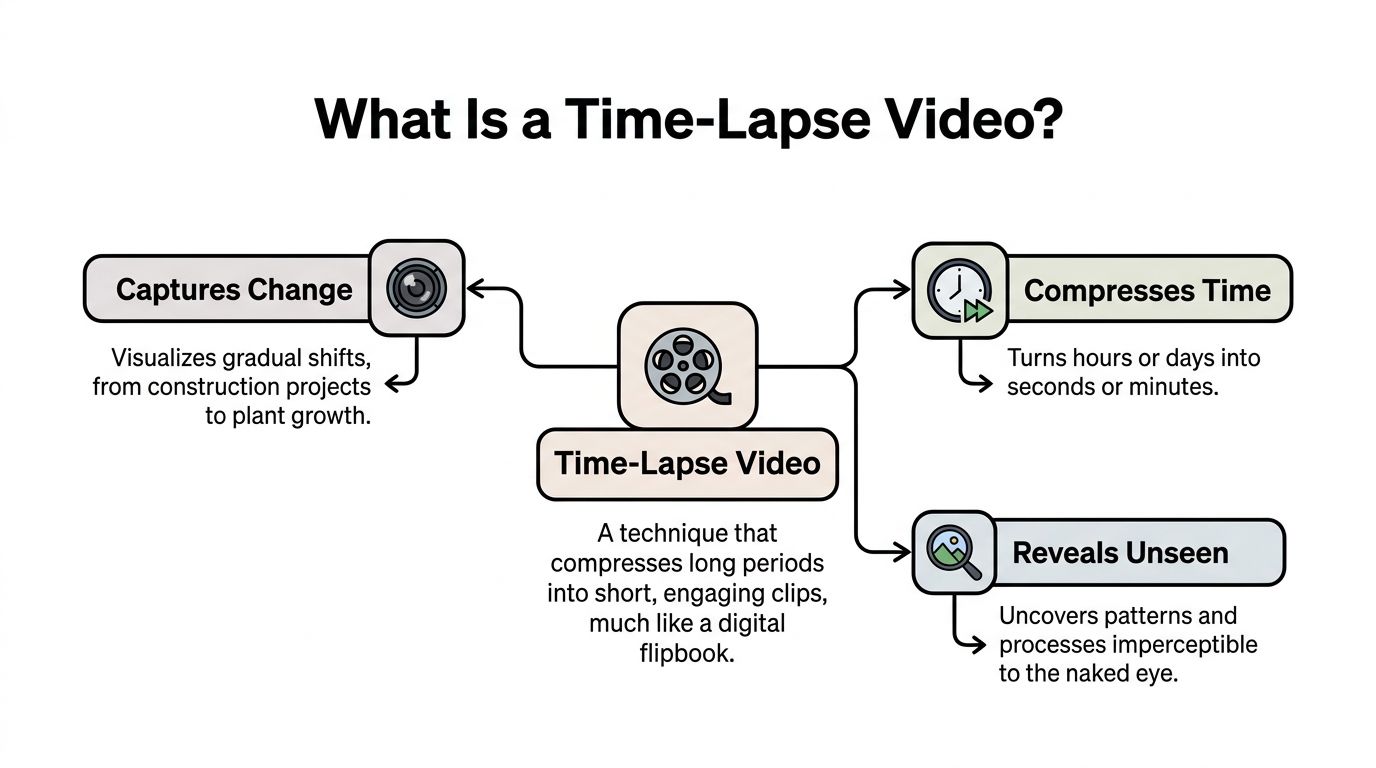
A time-lapse video works like a flipbook. You capture still frames over time, then play them back at normal video speed so slow changes suddenly look fast and dramatic.
That's why a sunrise feels cinematic in a few seconds, or a workspace reset looks satisfying instead of boring. The camera isn't “speeding up” live footage in the usual sense. It's sampling moments at intervals, then stitching those moments into motion.
The simple recipe
A time-lapse has three moving parts:
- The intervalThis is how often the camera captures a frame.
- The playback speedThis is the frame rate of the finished video.
- The event lengthThis is how long the actual event lasts.
When those line up well, the clip feels intentional. When they don't, the result feels jittery, too short, or weirdly flat.
According to Wikipedia's time-lapse photography overview, shooting at 1 frame per second and playing back at 30 frames per second creates a 30x speed increase. The same source notes that a 30-second video at 30fps needs 900 frames, and a four-hour event would require capturing one frame every 16 seconds to hit that result.
Why this matters for creators
If you're making short-form content, this math saves you from guessing.
A creator filming traffic, clouds, or people moving through a space usually wants visible motion fast. A creator documenting plant growth, a drawing process, or a long build needs a slower capture rhythm. You don't need to become technical about it, but you do need to know that interval choice controls the feel of the final clip.
Practical rule: Pick the subject first, then choose the interval. Fast-moving scenes can handle tighter capture spacing. Slow transformation needs patience, not more clips.
There's also a visual storytelling angle. Time-lapse naturally highlights transformation, and transformation holds attention. That's why it pairs well with motion graphics, captions, and overlays in faceless content. If you want to add movement on top of static framing later, it helps to understand related techniques like camera motion tracking.
What a time-lapse reveals that real-time misses
Some changes are too slow for the eye to appreciate in the moment. That's where time-lapse becomes more than a neat effect.
- Process becomes visible: setup, assembly, drawing, cooking, cleaning
- Patterns become obvious: shadows shifting, crowds forming, weather moving
- Progress feels satisfying: before-and-after transitions land harder
The best time-lapse clips don't just compress time. They expose structure inside a process. That's why they perform so well in short-form video. The viewer sees movement, direction, and completion almost immediately.
Powerful Time-Lapse Applications
The most useful way to think about a time lapse application is not as a camera feature, but as a compression tool for stories. It takes a process that would normally be too slow to watch and turns it into something a viewer can understand in seconds.
That's why the format works across wildly different niches.
Where creators get the most mileage
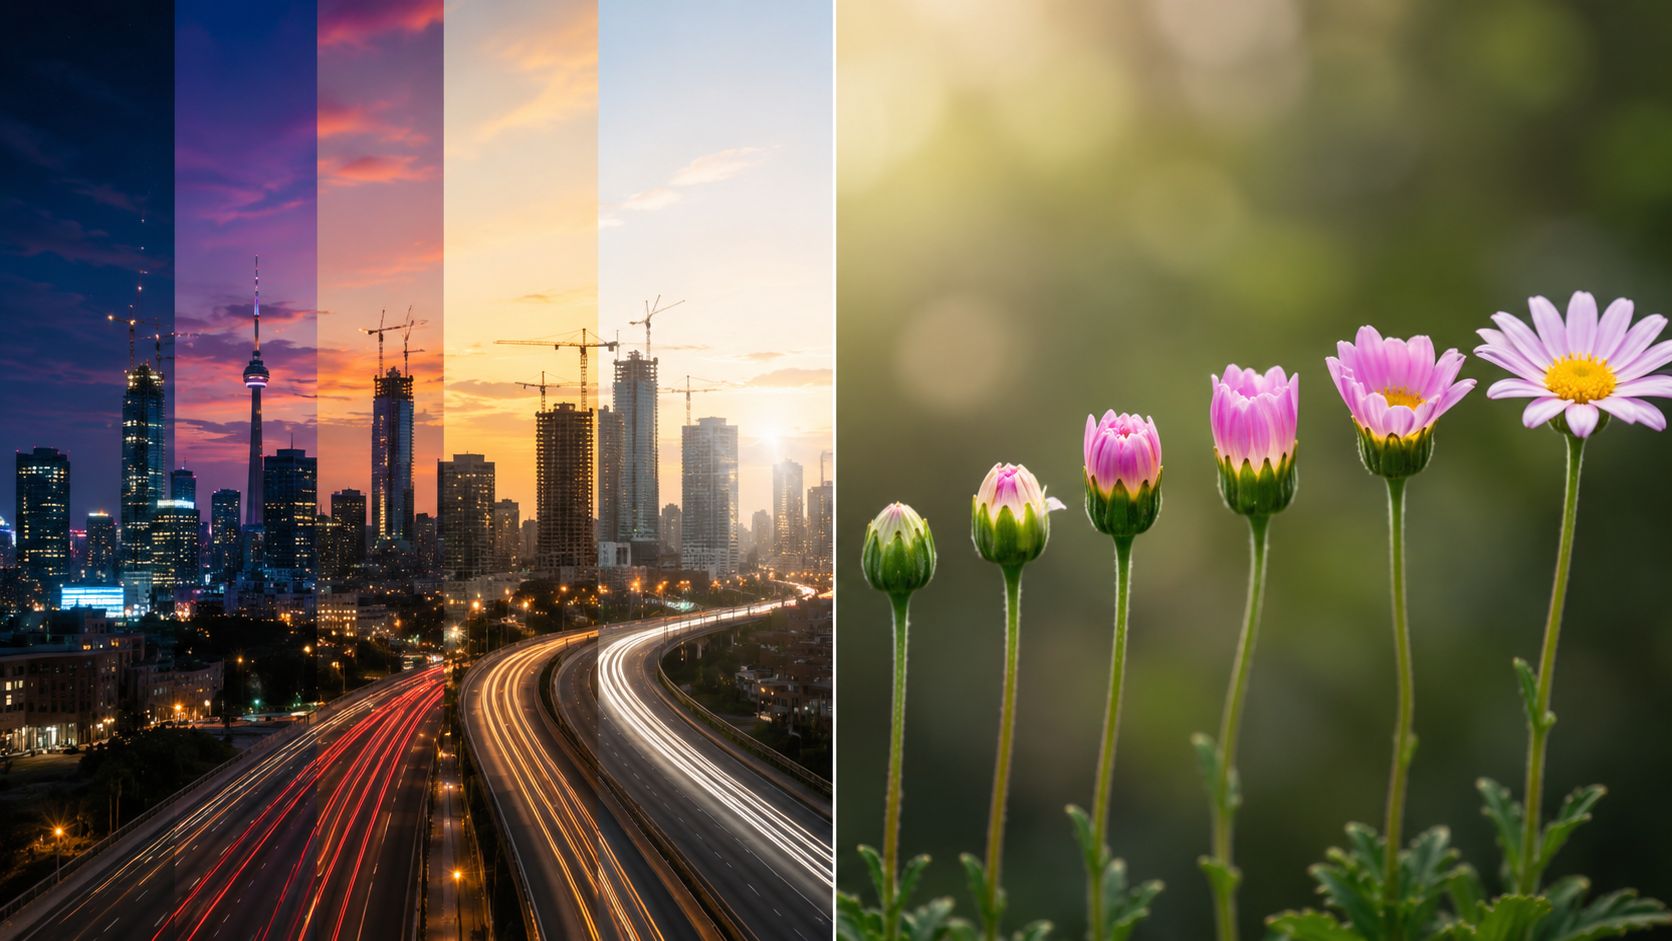
A builder can document a site changing over days. A maker can show an object being assembled. A digital artist can turn a long session into a reveal clip that feels immediate. A lifestyle creator can transform a room reset into satisfying B-roll for productivity content.
Short-form platforms reward visible change. Time-lapse delivers that without requiring constant cuts.
Here are a few strong use cases:
- City and weather footage: traffic, clouds, shifting light, busy sidewalks
- Desk and workspace transformations: setup, cleanup, cable organization
- Creative process videos: painting, sketching, crafting, editing timelines
- Product-focused clips: unboxing, assembly, packaging, arrangement
- Routine content: meal prep, journaling, store setup, shelf restocking
If you're building a faceless channel, these aren't just one-off posts. They're reusable visual assets. A single capture of a workstation reset can support productivity tips, narration-based shorts, or list-style posts.
A niche most creators overlook
Time-lapse also has practical value far beyond social content. One of the clearest examples is telehealth.
A Medical Xpress report on a Cornell-developed telemedicine solution describes an unmet need in remote care: accurate, repeatable time-lapse imaging of body parts for diagnosis. Consumer apps generally don't provide the AR guides needed for consistent framing day after day, which makes monitoring wound healing or post-surgical recovery harder than it should be.
That matters for creators because it shows something important. Time-lapse isn't only aesthetic. It's also about repeatability and comparison over time.
The strongest time-lapse content usually tracks one thing consistently. Viewers respond to progression they can measure with their eyes.
What this means for content strategy
Many creators treat time-lapse as filler. That's usually a mistake.
Used well, it can be the main event or the connective tissue between scenes. It can open a reel, carry a voiceover, or provide the proof inside a tutorial. If you're reviewing your toolkit, it helps to look beyond camera apps and study broader content creation apps for creators so your shooting, editing, and publishing stack fits together.
The broader lesson is simple. A good time-lapse doesn't just show that time passed. It shows that something changed in a way worth watching.
How to Create Your First Time-Lapse
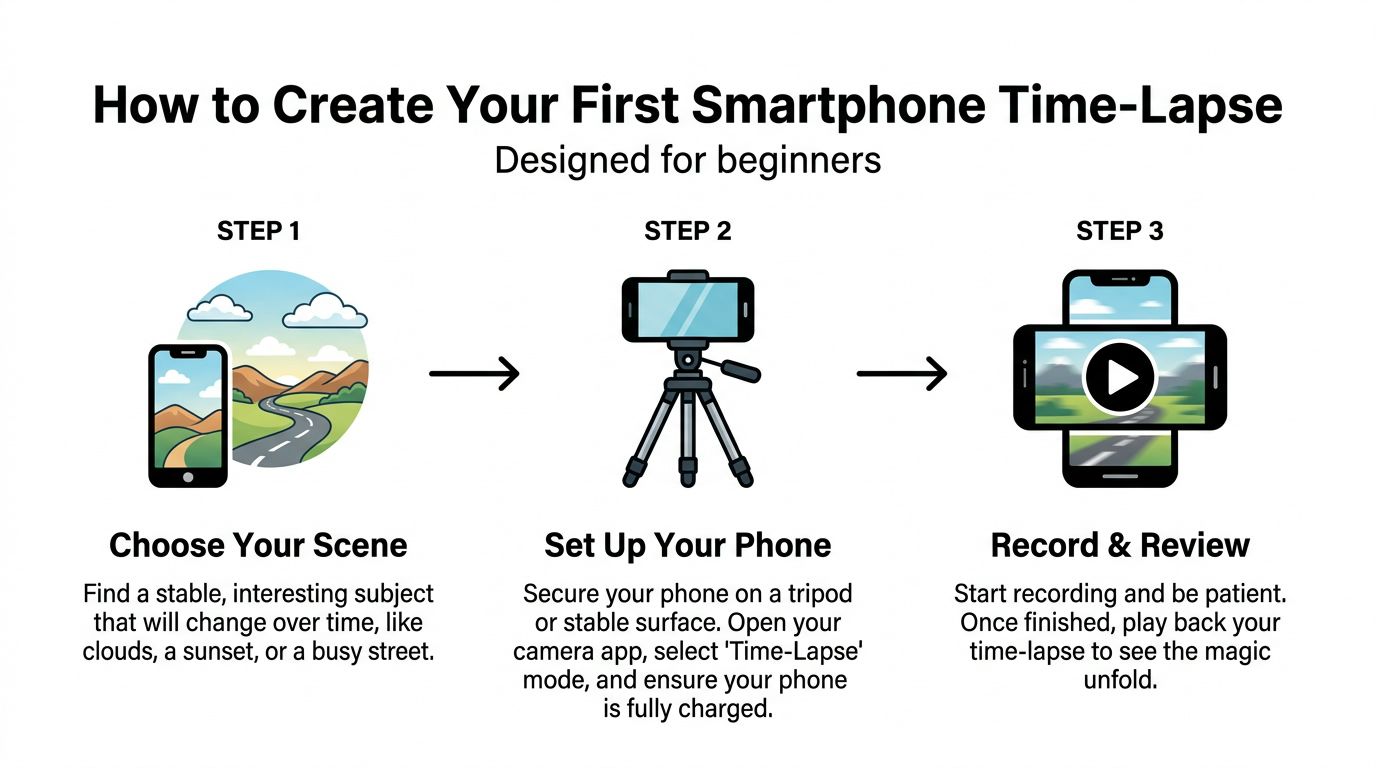
The fastest path is your phone. It's already in your pocket, and it's good enough to produce shareable footage if you make a few smart choices before you start.
The biggest beginner mistake isn't bad editing. It's unstable capture and poor planning.
Start with a scene that changes clearly
Pick a subject with obvious progression. Clouds, sunset light, street activity, a desk transformation, a recipe assembly, or a drawing session all work because the viewer can see movement or completion.
Then lock the phone down. A tripod is best, but any stable surface is better than handheld capture. If the frame drifts, the time-lapse usually looks accidental.
A few planning checks help:
- Choose one subject: Don't try to capture everything in the room.
- Keep the frame clean: Background clutter steals attention from the change.
- Think vertical first: If the clip is headed to Shorts, Reels, or TikTok, frame for that use case.
- Charge fully: Long captures fail for boring reasons more often than creative ones.
If you're still building your basics as a creator, these SuperX beginner content tips are a practical companion because they focus on repeatable habits instead of flashy shortcuts.
Use the right app features
Built-in phone camera apps can be limiting. A Reddit discussion from Sony Xperia users highlights a familiar issue: many stock camera apps, even on high-end phones, lack intervalometer controls and raw capture, which pushes creators toward third-party apps when they want more professional control.
That doesn't mean you need the most advanced app on day one. It means you should know what to look for.
Useful features include:
- Interval controls: so you can decide how often frames are captured
- Exposure lock: so brightness doesn't jump during the sequence
- Focus lock: so the phone doesn't hunt mid-shot
- Raw or high-quality frame capture: if you want more flexibility later
- Aspect ratio options: so you don't have to crop away your composition
For creators repurposing clips across platforms, it's worth understanding how to change aspect ratio of video before you shoot. Fixing framing after capture is possible, but planning for platform format is cleaner.
A quick visual walkthrough can help if you learn better by watching:

Edit for payoff, not duration
Once you've got the footage, trim hard. Most beginner time-lapses run too long because the creator is attached to the effort it took to capture them.
Editing rule: Keep the moment of change. Cut the dead air before and after it.
In practice, that means:
- Clip the opening wobble.
- Remove the dull tail at the end.
- Add light contrast or color correction if needed.
- Test whether the clip works silent before adding music or narration.
A first time-lapse doesn't need to be perfect. It needs one clear transformation, steady framing, and a short enough runtime that someone watches it through.
Best Practices for Short-Form Creators
A time-lapse that works in a gallery doesn't automatically work in a feed. Short-form platforms reward momentum, clarity, and visual payoff almost immediately.
That changes how you should shoot and finish the clip.
Choose transformation over scenery
Pretty footage helps, but change is what carries retention. A skyline can work. A skyline shifting from flat daylight into dramatic light usually works better. A clean desk is fine. A messy desk turning into a clean setup is stronger.
The best short-form time-lapses share a few traits:
- A visible before and after: viewers understand the point instantly
- Simple composition: the eye knows where to look
- A short payoff window: something meaningful happens fast
- A single idea: one clip, one transformation, one message
Creators often overcomplicate this. The clip doesn't need to be grand. It needs to be legible on a small screen.
Stabilize the capture and the power
Professional systems used in construction and nature lean on rugged hardware, flexible scheduling, cloud processing, and reliable power. A CamDo overview of construction time-lapse camera features also points to practical lessons creators can borrow, especially stable power and tools like LRTimelapse for correcting flicker and exposure shifts.
That sounds industrial, but the takeaway is simple. If your battery dies or your exposure jumps, viewers notice.
A basic creator version of that discipline looks like this:
| Problem | What usually causes it | What works better |
|---|---|---|
| Flicker | Auto exposure shifts | Lock exposure before recording |
| Frame drift | Handheld capture or weak mount | Use a tripod or fixed surface |
| Inconsistent sessions | Random capture habits | Shoot the same setup repeatedly |
| Flat pacing | No clear peak moment | Cut to the strongest transformation |
Don't confuse speed with energy
A common mistake is assuming a faster clip is always a better clip. It isn't. If everything whips by too quickly, the viewer can't process the transformation.
Smooth time-lapse feels intentional. Chaotic time-lapse feels like a mistake.
If you want more energy, use better subject choice, stronger cropping, or a cleaner ending. Save hyperlapse-style movement for cases where the camera motion adds meaning, not just novelty.
Polish what viewers actually notice
Most audiences won't name the issue if something feels off. They'll just keep scrolling. That's why finishing matters.
Focus on these fixes first:
- Deflicker the sequence: especially if the light changed while shooting
- Correct exposure shifts: avoid pulsing brightness
- Trim aggressively: dead seconds hurt more in short-form
- Add captions with intent: not every clip needs text, but a strong caption can frame the transformation
The polished look usually comes from preventing problems before capture, then making a few disciplined edits after. That's what separates “sped-up footage” from a short-form asset you can publish with confidence.
Essential Time-Lapse Tools and Software
Not every time lapse application solves the same problem. Some help you capture and refine footage. Others use delay and anticipation as part of a social experience. If you mix those categories together, you'll probably choose the wrong tool.
Creation tools versus social tools
Here's the practical split:
| Tool type | Best for | What to expect |
|---|---|---|
| Creation apps | Shooting and editing time-lapse footage | Interval control, manual settings, export options |
| Social concept apps | Sharing delayed or stylized media | Novelty, anticipation, community behavior |
| Desktop finishing tools | Cleanup and polish | Deflicker, exposure correction, sequencing |
This distinction matters more than long “best app” lists.
If your goal is controlled capture, you want features like intervalometer settings, focus lock, exposure control, and better output flexibility. If your goal is trend participation or a stylized social mechanic, you may care more about the app's experience than its camera depth.
A good example of the social side
The app Lapse shows how the idea of delayed imagery can become a product mechanic, not just a video format. An Online Optimism write-up on Lapse app stats notes that the app had approximately 1.2 million users as of October 29, 2023, had reached number 1 in the Photo & Video category on the App Store, and uses a waiting period of one to three hours before users can view photos.
That's not classic time-lapse creation. It's anticipation design.
For creators, the lesson is useful. Delay itself can be engaging. People don't only respond to speed. They also respond to reveal.
What belongs in a practical creator stack
A functional stack usually has three layers:
- Capture app: something with real control over intervals and exposure
- Cleanup software: especially if you need deflicker or color consistency
- Editing and publishing workflow: where the clip gets turned into a platform-ready asset
You don't need the most complicated setup available. You need one that reduces rework. If you're producing content at volume, it also helps to study adjacent systems like this guide to scaling video ad production, because the same bottlenecks show up fast when you move from one good clip to repeatable output.
What doesn't work well
Creators lose time when they rely on the wrong tool for the job.
A social app won't replace controlled capture. A stock camera mode may be fine for casual use, but it can become frustrating if you need consistency across repeated shoots. Desktop tools are powerful, but they can't rescue every badly planned sequence.
Choose based on workflow, not hype. If the clip needs to support repeatable publishing, the best tool is the one that gives you stable input and fast cleanup.
Automating Time-Lapse in Your Content Workflow
Time-lapse proves far more valuable than a one-off visual trick. In a faceless workflow, a strong time-lapse clip can function as the visual backbone for several different short-form videos.
One capture session can support a tutorial, a narrated explainer, a list post, a product story, or a niche educational short. That's the advantage most creators miss.
Use one clip in multiple formats
A single sequence of a meal being assembled can become:
- A recipe short: focused on the final result
- A process video: focused on efficiency or prep flow
- A productivity post: framed around batching habits
- A voiceover explainer: built around technique or mistakes
- A brand post: centered on ingredients, tools, or packaging
The same logic works for plant growth, studio setup, product assembly, storefront prep, or a digital art process. The footage doesn't need a face to be engaging because the transformation already carries the scene.
Build the workflow around reusable assets
A scalable system usually looks like this:
- Capture a clean time-lapse libraryRecord repeatable processes in vertical format when possible.
- Tag clips by use caseSort them into folders like “setup,” “assembly,” “food prep,” “workspace,” or “nature.”
- Pair footage with scripts laterLet the visual lead, then match the narrative angle to it.
- Publish variations across platformsThe same footage can support different hooks, captions, and voiceovers.
This is why time-lapse fits automation so well. It's compact, visually active, and doesn't depend on lip sync or live performance. You can treat it like inventory.
Workflow insight: Don't shoot for one post. Shoot for a content bank.
Where automation tools help
Once you've got the footage, the bottleneck usually shifts from creation to packaging. Writing scripts, recording voiceovers, captioning, resizing, scheduling, and posting can take more time than the original capture.
That's why many creators eventually compare social media automation platforms to figure out which parts of publishing they can remove from the manual workflow. The right automation stack won't replace judgment, but it can remove repetitive production steps that slow consistency.
What scales and what doesn't
What scales:
- Reusable footage with clear transformation
- Simple framing that works across multiple topics
- Organized clip libraries
- Repeatable editing templates
- Narration layered onto visual process
What usually doesn't:
- One-off captures with no metadata
- Clips that only make sense with a face on camera
- Overly specific angles that can't be repurposed
- Messy files buried in a camera roll
Time-lapse earns its place in an automated system because it does two jobs at once. It attracts attention on its own, and it gives structure to faceless storytelling. That combination is hard to beat when you're trying to publish consistently without filming yourself every day.
If you want to turn raw visuals into publish-ready faceless shorts faster, ClipCreator.ai helps you generate scripts, voiceovers, subtitles, and finished videos built for TikTok, YouTube, and Instagram. It's a practical way to turn a simple time-lapse clip into a steady stream of story-driven content without getting stuck in manual editing.

Create your first video in under 2 minutes
Pick a niche, and ClipCreator.ai generates and auto-posts faceless videos to your channels every day.
Join ClipCreator.ai