You've finished a video, opened TikTok, and started looking for the voice effect that will make the narration work. The button might be missing. Or the effect is available, but your clear recording suddenly sounds muffled, robotic, or out of sync.
A TikTok voice changer works best as a production step, not a last-minute rescue. Choose how the voice will be created, check whether your footage supports that approach, and approve the audio before you finish the edit.
Know Which Voice Tool You Actually Need
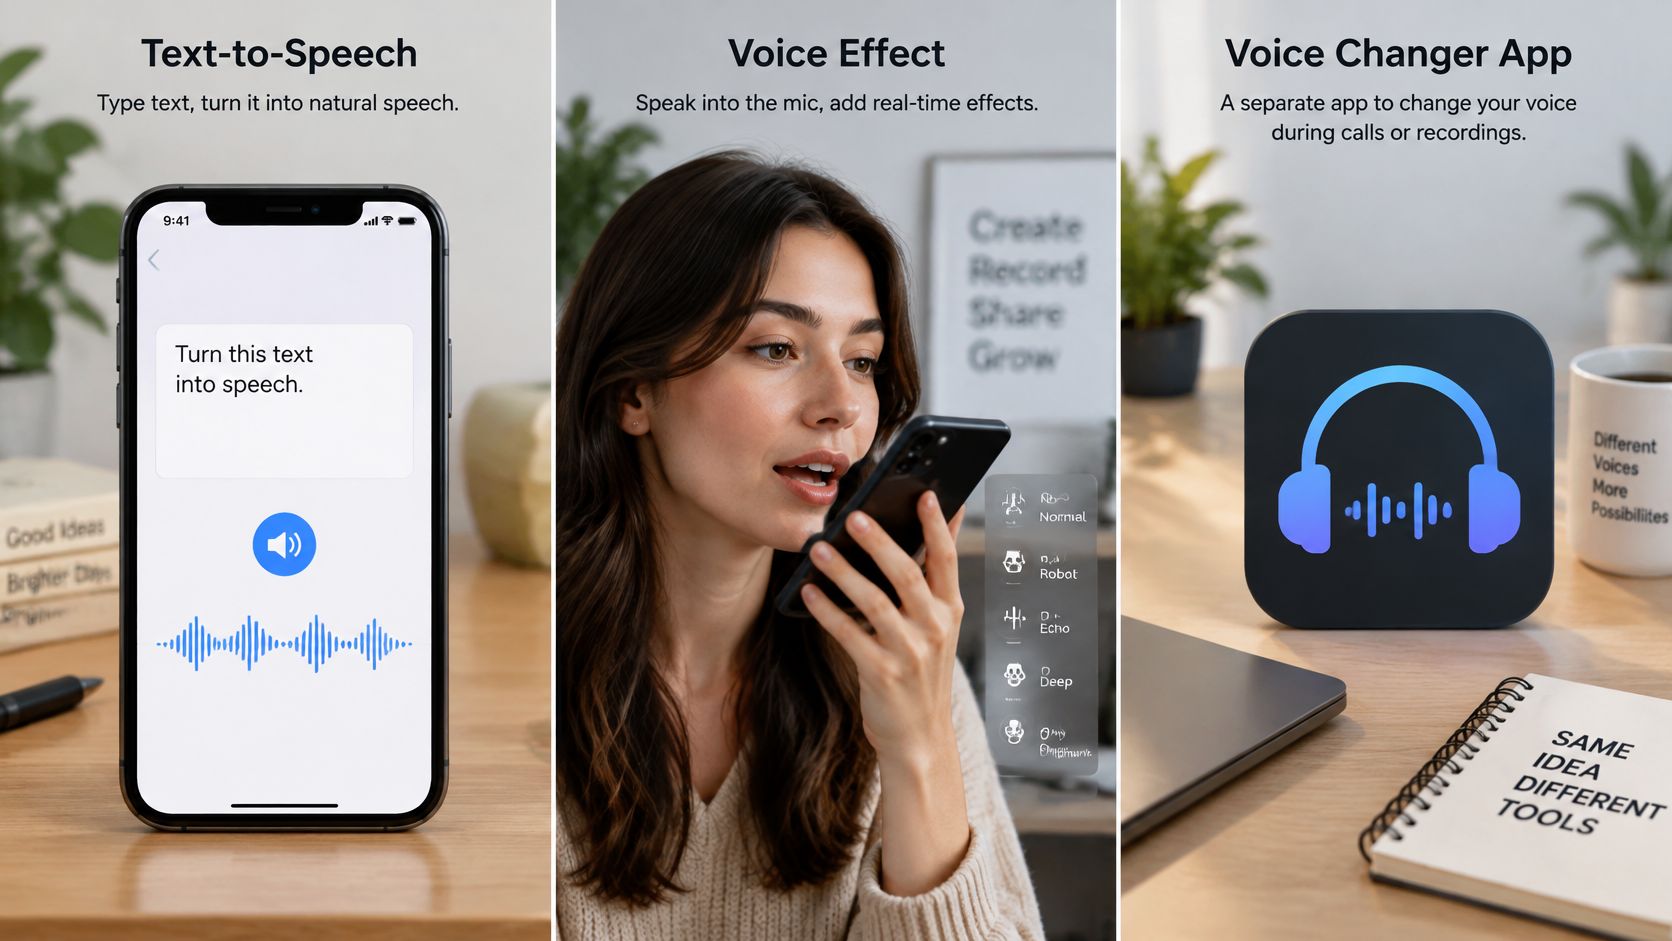
Text-to-speech generates narration from typed text, while voiceover records your speech. Voice effects transform speech that already exists in a clip.
Those operations solve different problems. Searching for a Tik Tok voice changer can lead you to any of them, but selecting the wrong operation usually means rebuilding part of your video.
TikTok introduced text-to-speech in 2020 as an accessibility feature for reading on-screen text aloud, according to Revoicer's history of typed narration. It also gave creators a way to narrate without speaking into a microphone, which makes it useful for anonymous storytelling, explainers, and character-led content.
The interface may put these tools close together, but their inputs are different.
Make These Checks Before Editing
- Do you already have a recording you want changed? You need voice conversion or an effect, not a tool that reads a script.
- Do you need the same voice across many clips? Prioritize a saved voice choice and repeatable settings rather than whichever effect sounds funniest today.
- Will you publish inside TikTok or through another tool? Decide whether the finished narration needs to exist as an audio file before the video reaches TikTok.
Say you're making a faceless history explainer and don't want to record yourself. A generated narrator is a better starting point than recording your natural voice solely to disguise it. Our guide to AI text-to-speech voices explains that narration choice in more detail.
If you've already delivered a comic line and want to preserve its timing, changing the recording makes more sense. The performance already exists; you're changing its sound, not replacing its delivery.
Start with the operation: Generate speech, record speech, or transform speech. Name the job before opening the effect menu.
For a recurring faceless series, also decide what should remain recognizable: the narrator, the character performance, or the writing style. That distinction helps you avoid choosing an exaggerated effect that works for a joke but becomes tiring across a full story.
How to Apply a Voice Effect in TikTok Step by Step
Start with a short spoken clip, not a fully mixed video. TokConnect's TikTok text-to-speech guide distinguishes recorded-voice effects from text-based narration, an important difference when choosing which audio to edit.
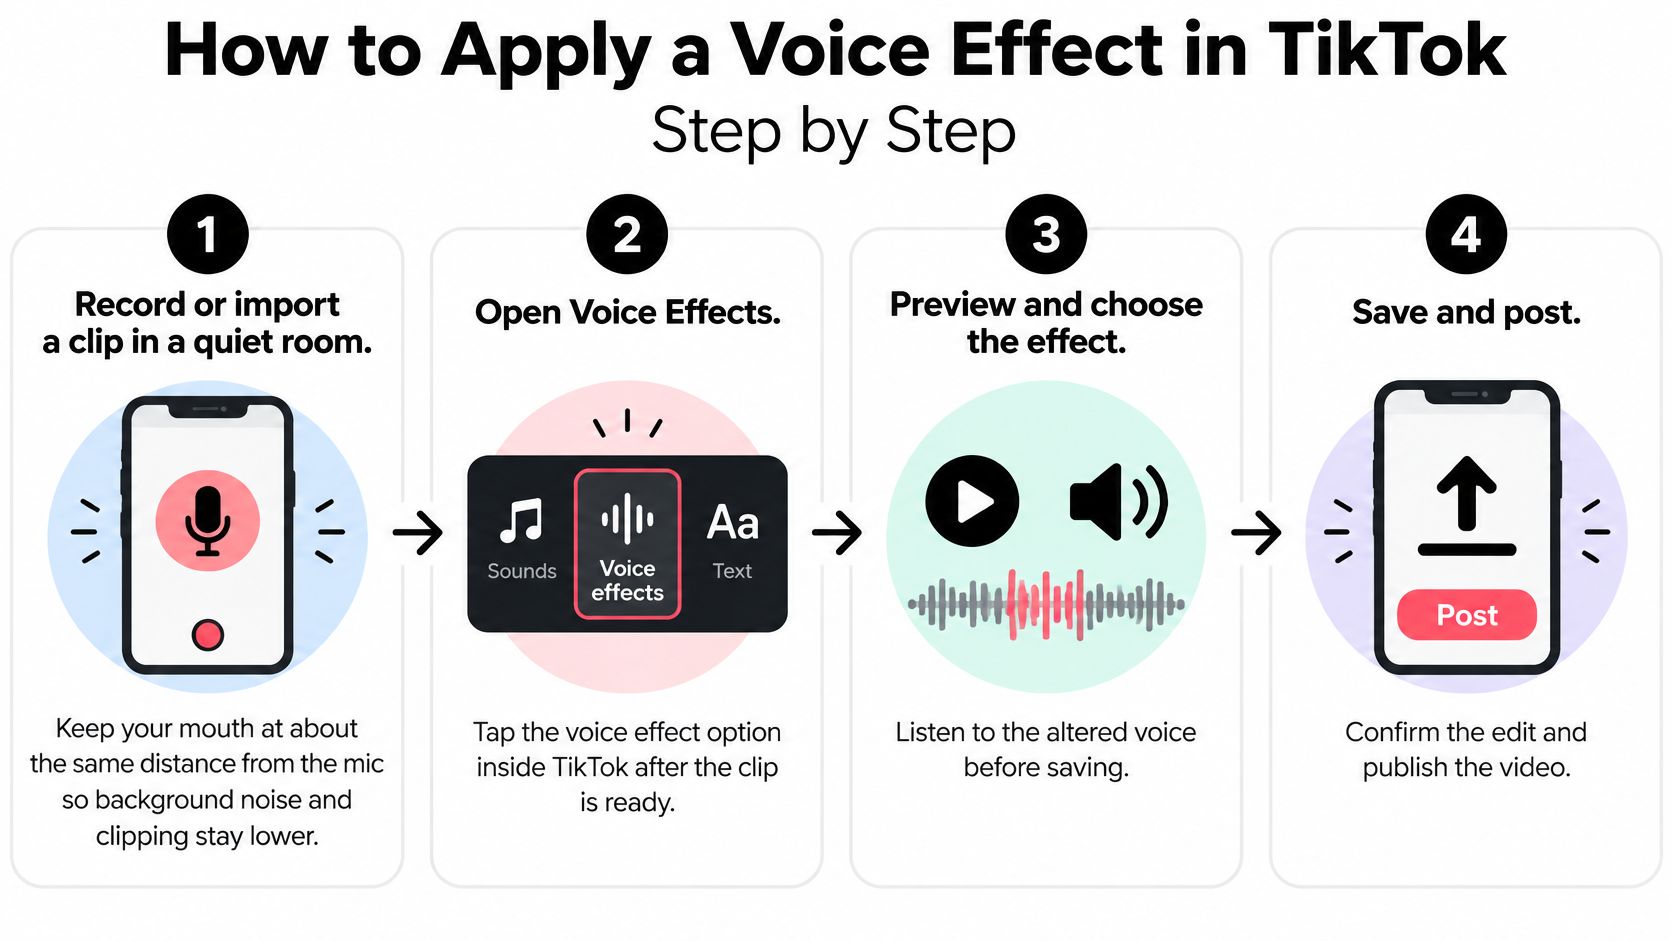
Use this visual as a quick reference while working through the recording and preview stages.
Apply and Verify the Effect
- Record or import clean speech. Record in a quiet room, keeping your mouth at a consistent distance from the microphone; if importing, use a version without background music when possible. Listen to the untreated recording first, because conversion can make room echo, noise, and clipping more obvious.
- Find the voice controls. After recording, continue to TikTok's editing screen and look for Voice effects, a voice icon, or the relevant audio menu. Labels and placement can change between versions, and an imported clip may not offer the same controls as a native recording.
- Choose an effect and preview it. Play the result at normal phone-speaker volume, not just through headphones. Choose the least aggressive effect that achieves the character or tone you want without burying consonants.
- Check the words that are easiest to mishear. Pay particular attention to names, numbers, and sentence endings. If a sentence becomes unclear, replace that sentence rather than rebuilding an otherwise usable performance.
- Add captions and correct them. Compare the displayed text against the processed audio, including punctuation that changes meaning. Keep captions away from interface controls and make sure each phrase appears while the corresponding words are spoken.
- Save or publish the approved version. Listen once more after adding music, because a clear voice can become difficult to follow in the final mix. Save a draft if you still need to check wording, disclosure, or the posting caption.
For text-to-speech, treat every text box separately. Selecting a voice for one box doesn't necessarily update the others, so audition the whole sequence for accidental voice changes.
The video below provides an additional visual reference for the in-app process.

Judge the Complete Post
Don't approve the effect from an isolated word. Listen across edits, pauses, and changes of scene, especially when the narrator introduces a new subject.
For a business account, make that review part of the posting routine rather than an optional creative check. Blu Dragonfly LLC's guidance on how to build a small business social strategy is useful context for placing production decisions inside a repeatable publishing plan.
The final test is straightforward: a viewer should understand the narration through a phone speaker and follow the message with sound off through captions. If either version fails, the post isn't ready.
Why the Voice Effect Option Is Missing
An uploaded or duet clip is the first thing to check when the voice effect control isn't visible. A video that already contains a sound may also follow a different editing path from speech recorded directly inside TikTok.
Don't keep searching every menu without testing the input. Record a fresh spoken clip in the app and inspect its editing options. If the effect appears there, the problem is likely the original clip's compatibility, not your ability to find the button.
Voice effect symptoms, causes and fixes
| Symptom | Likely cause | Fix |
|---|---|---|
| Voice effects option not shown | Uploaded video, duet or clip with an existing sound | Re-record in the app or convert the voice in an external editor |
| Effect distorts or clips | Long single recording or loud, noisy source | Cut into sentence-level takes and re-record closer to the mic without overloading it |
| Result sounds flat or robotic | Heavy effect applied to weak audio | Choose a milder effect or export and adjust pitch and noise externally |
| Voice drifts out of sync after edits | Long take processed in one pass | Process shorter segments and check alignment before publishing |
| Effect disappeared after an update | Version or regional rollout difference | Update the app, then switch workflow if it stays missing |
Separate Quick Fixes From Recording Problems
Updating the app, trying a milder preset, and checking a fresh native recording are quick diagnostic tasks. They don't require rebuilding your existing video, so try them before touching the timeline.
Distortion needs a different response. If the original speech crackles or overloads, moving closer to the microphone isn't automatically the answer. Reduce input level or back away slightly, then record in a quieter space with less room echo.
For a long passage, divide the script at natural sentence boundaries. Keep breathing space around each take so you can replace a line without cutting into a word.
Stop Repeating a Failed Edit
A flat result may improve with a restrained effect, but native controls won't necessarily provide the pitch, speed, or noise adjustment you need. Exporting to an editor is preferable to layering more processing onto damaged speech.
For sync drift, compare the beginning and end of each processed segment against its intended visual cue. Don't stretch the entire narration to repair a local mismatch; correct the affected segment.
A missing control after an update may reflect a version or regional rollout difference rather than a fault you can fix locally. If the repair requires more than a single re-record, change the workflow instead of repeating the same steps.
Which Voice Workflow Fits Your Video
| Workflow | Imported footage | Pitch and noise control | Best for |
|---|---|---|---|
| Native TikTok voice effect | Often unavailable | Limited | One-off recordings made in the app |
| External voice editor export | Yes | Strong with a suitable editor | Scheduled, repeatable batches across platforms |
| Text-to-speech narration | Yes, as added audio | Voice choice only in a basic workflow | Faceless narratives without recording |
| Record then convert (hybrid) | Yes | Strong with a suitable editor | Recognizable character voice across a series |
The controls and compatibility matter more than the number of entertaining presets. CapCut's TikTok voice-change guide describes restrictions around uploaded videos, duets, and clips containing existing sounds, which makes a native effect a poor dependency for an otherwise finished edit.
Native Convenience Versus External Control
Native effects suit a spontaneous recording. You can perform, preview, and publish without leaving TikTok. Accept the constrained controls when the effect is a small part of the joke and the original recording is already strong.
An external editor gives you a separate audio approval stage. Import the clean narration, apply conversion, adjust the available controls, and export the approved result before mixing it with footage and music.
That route adds an export and re-import step. It also means you must manage files carefully: retain the original recording, name the converted version clearly, and avoid accidentally using an earlier take.
For scheduled, cross-platform publishing, TikTok's native changer is often the least suitable option. Its convenience matters most when the entire job is a single native post.
This isn't an argument for complicated software. It's a recommendation to keep an important production dependency outside a posting screen when you need repeatable results.
Generated Narration Versus a Converted Performance
Text-to-speech suits script-led content where the narrator doesn't need your personal delivery. Choose the voice before timing the visuals, then revise awkward phrases in the script rather than trying to hide them with music.
A hybrid workflow preserves a performed rhythm while changing the speaker's sound. It's useful when a recurring character needs deliberate pauses, reactions, or emphasis that you want to direct yourself.
Our video voiceover guide provides additional context for fitting narration to an edit. Whichever route you choose, approve the clean speech before making the final music mix.
Third-party voice changer apps can offer more pitch control than native presets, but cloud-based tools may require uploading your recording. Check their data terms before sending a voice you wouldn't want retained or reused.
The decision rule is simple: native effects for one-off fun, external processing for repeatable quality, and text-to-speech when you don't want to record.
Privacy, Disclosure and Consent Rules
| Situation | What to do |
|---|---|
| Anonymity is the goal and no real person's voice is used | Use a non-identifying generated voice |
| Altering a recognizable person's voice | Get written consent first and keep a record |
| Realistic synthetic speech or materially changed speech | Label it on screen and check the platform's AI-generated content controls |
| Basic fun filter on your own voice | Usually no label needed; keep it clearly a filter |
| Sponsored content with a changed or synthetic voice | Check advertising-specific disclosure rules before posting |
A comic filter and a realistic synthetic speaker aren't the same risk. Leo AI's commercial voice-use guidance distinguishes ordinary effects from realistic synthetic or substantially AI-modified audio that may require disclosure.
The key question isn't whether you used an AI tool. It's whether someone could misunderstand who is speaking or what that person said.
Protect Anonymity Without Inventing a Misleading Identity
For anonymity, choose a generated voice that doesn't imitate an identifiable person. Changing your own voice can reduce exposure, but don't assume a filter guarantees anonymity when your script, surroundings, or account history still reveal your identity.
When using another person's recognizable voice, make written permission a production requirement. Record the permitted use, whether commercial publication is included, and whether the agreement covers conversion or cloning rather than ordinary editing alone.
A realistic voice paired with a real person's image can imply an endorsement or statement they never made. A playful intention doesn't remove that risk.
Disclosure check: If viewers could reasonably mistake the speaker or the meaning of the recording, add a clear label or change the creative approach.
For realistic synthetic narration or materially altered speech, review TikTok's current AI-generated-content controls and apply the required disclosure. Use readable on-screen wording where appropriate, but don't assume a custom caption replaces a platform control that must be enabled.
Check What Happens to Uploaded Recordings
Before uploading speech to a voice app, inspect its rules for retention, model training, deletion, and third-party sharing. A privacy page such as LunaBloom AI's information about data collection is the kind of document to examine, not proof that every provider treats audio the same way.
Our guide to whether dubbing AI is safe can help frame that review. Pay particular attention when the recording contains a client's voice, a private conversation, or information unrelated to the published video.
Basic novelty effects on your own speech usually don't raise the same labeling issue, provided you present them as effects rather than authentic evidence. Sponsored content creates a separate advertising-disclosure obligation that a voice label doesn't resolve.
Consent, AI disclosure, and sponsorship disclosure are separate checks. Review current platform policy before launching a series, and keep your approval records with the source audio.
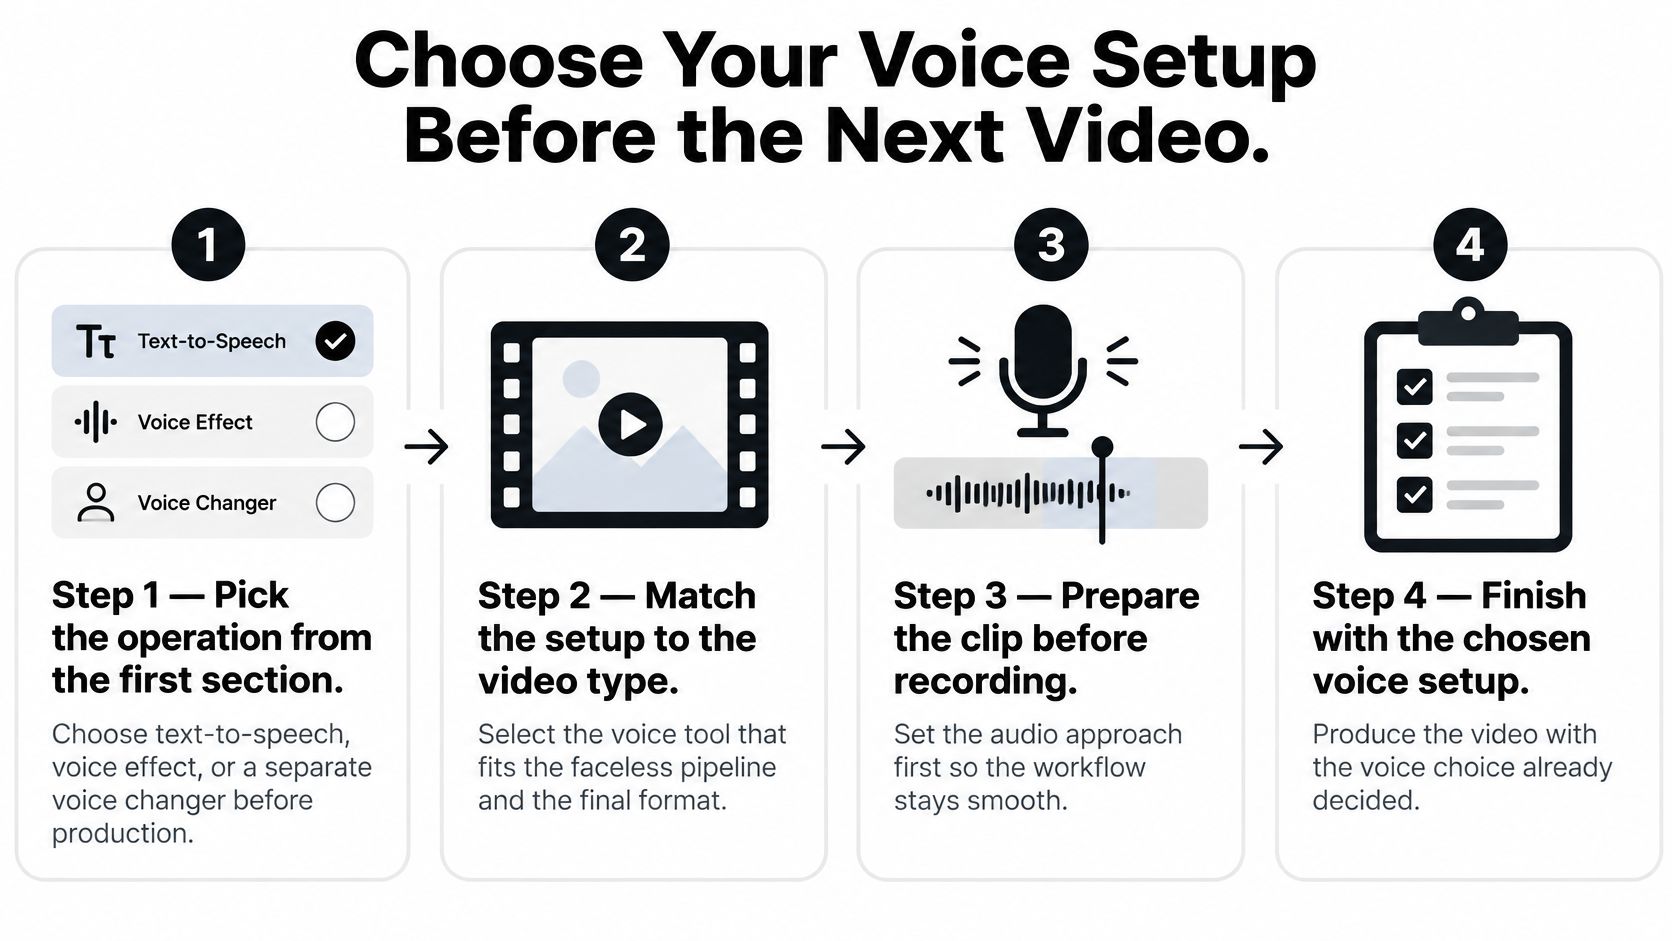
Choose Your Voice Setup Before the Next Video
- Pick the operation before production. Decide whether the video needs generated narration, a recorded voiceover, or transformed speech. Put that choice in the production notes so nobody builds the edit around an unavailable effect.
- Confirm permission and labeling. Identify the voice owner, the intended use, and any disclosure the finished post needs. Resolve those questions before spending time on a performance you can't publish.
- Prepare sentence-level takes. Generate or record manageable passages, then set their loudness consistently. Leave natural pauses where the visuals need time to communicate rather than forcing every scene under continuous speech.
- Run the listening and caption checks. Preview the finished mix through a phone speaker and review the captions with sound off. Check the actual export, not only the editor's timeline preview.
- Finish the publishing details. Edit the title and caption, confirm the correct account and disclosure settings, and publish the approved version. Keep the source script and final audio together so later corrections don't require starting over.
Use this setup checklist before committing to the visual edit.
Build a Process You Can Repeat
For polished faceless videos, we offer a variety of AI-generated voices at ClipCreator.ai. After you connect a TikTok or YouTube account, we handle everything from video creation to publishing, including automatic publishing to those platforms; you can also download any generated video and publish it manually.
If the performance needs your timing rather than generated delivery, a separate conversion route may fit better. A tool designed to transform your recorded voice, such as revid.ai's voice changer, belongs before the final video assembly, where you can still replace a line without disturbing the finished post.
Choose the route based on what you need to control. A storyteller may prioritize delivery and pauses, while an educational channel may prioritize pronunciation and quick script revisions.
Use Productivity Findings Carefully
Researchers from the University of British Columbia analyzed 554,252 TikTok videos in a 2024 study and found that creators using TikTok's AI voice produced 24% more videos per week, according to the university's summary of the study. That's a productivity finding, not a promise that choosing an AI voice will produce the same result for your account.
The useful takeaway is operational: removing repeated recording work can make a publishing routine easier to maintain. It doesn't remove the need to approve the script, pronunciation, captions, and final presentation.
This week, choose a single workflow for your next three videos. Keep the voice settings consistent, run the phone-speaker and sound-off checks on every export, and scale only when you can repeat the process without emergency audio repairs.
ClipCreator.ai offers AI-generated narration for faceless videos, with creation and automatic publishing to connected TikTok and YouTube accounts. Visit ClipCreator.ai to choose a voice for your next video and build a repeatable publishing workflow instead of relying on a last-minute voice effect.

Create your first video in under 2 minutes
Pick a niche, and ClipCreator.ai generates and auto-posts faceless videos to your channels every day.
Join ClipCreator.ai