Horror made up only 1.01% of TikTok videos, yet those videos generated 7.9% more likes and 13.5% more comments than platform averages, according to a peer-reviewed analysis of the platform's content (International Conference on Communication and Journalism). That gap changes how you should think about a scary story maker. It isn't merely a prompt box that produces spooky prose. It can become a publishing system that turns one repeatable narrative format into scripts, voiceovers, visuals, captions, and scheduled short videos.
The creators who keep horror channels alive don't win by generating one clever story. They win by making every episode recognizable, fast to produce, and structured around a reason to keep watching. The workflow below treats the tool as a complete production pipeline for TikTok, YouTube Shorts, and Instagram Reels, with particular attention to voice consistency, short-form pacing, and hooks that create immediate uncertainty.
What a Scary Story Maker Does for Short-Form Creators
A useful scary story maker connects story development to publishing. It turns a repeatable brief into a finished vertical video while preserving the narrator's personality, visual logic, and tension curve across episodes.
Horror has enough historical volume to support that workflow. A 2022 arXiv study analyzing a large corpus of scary-story text found that yearly output rose rapidly to over 20,000 stories before declining slightly, while hourly distribution showed production continuing throughout the day in GMT (Decomposing the Fundamentals of Creepy Stories). The finding supports horror as a broad content format with enough material for repeatable production, not merely a niche writing exercise.
Build the pipeline, not the prompt
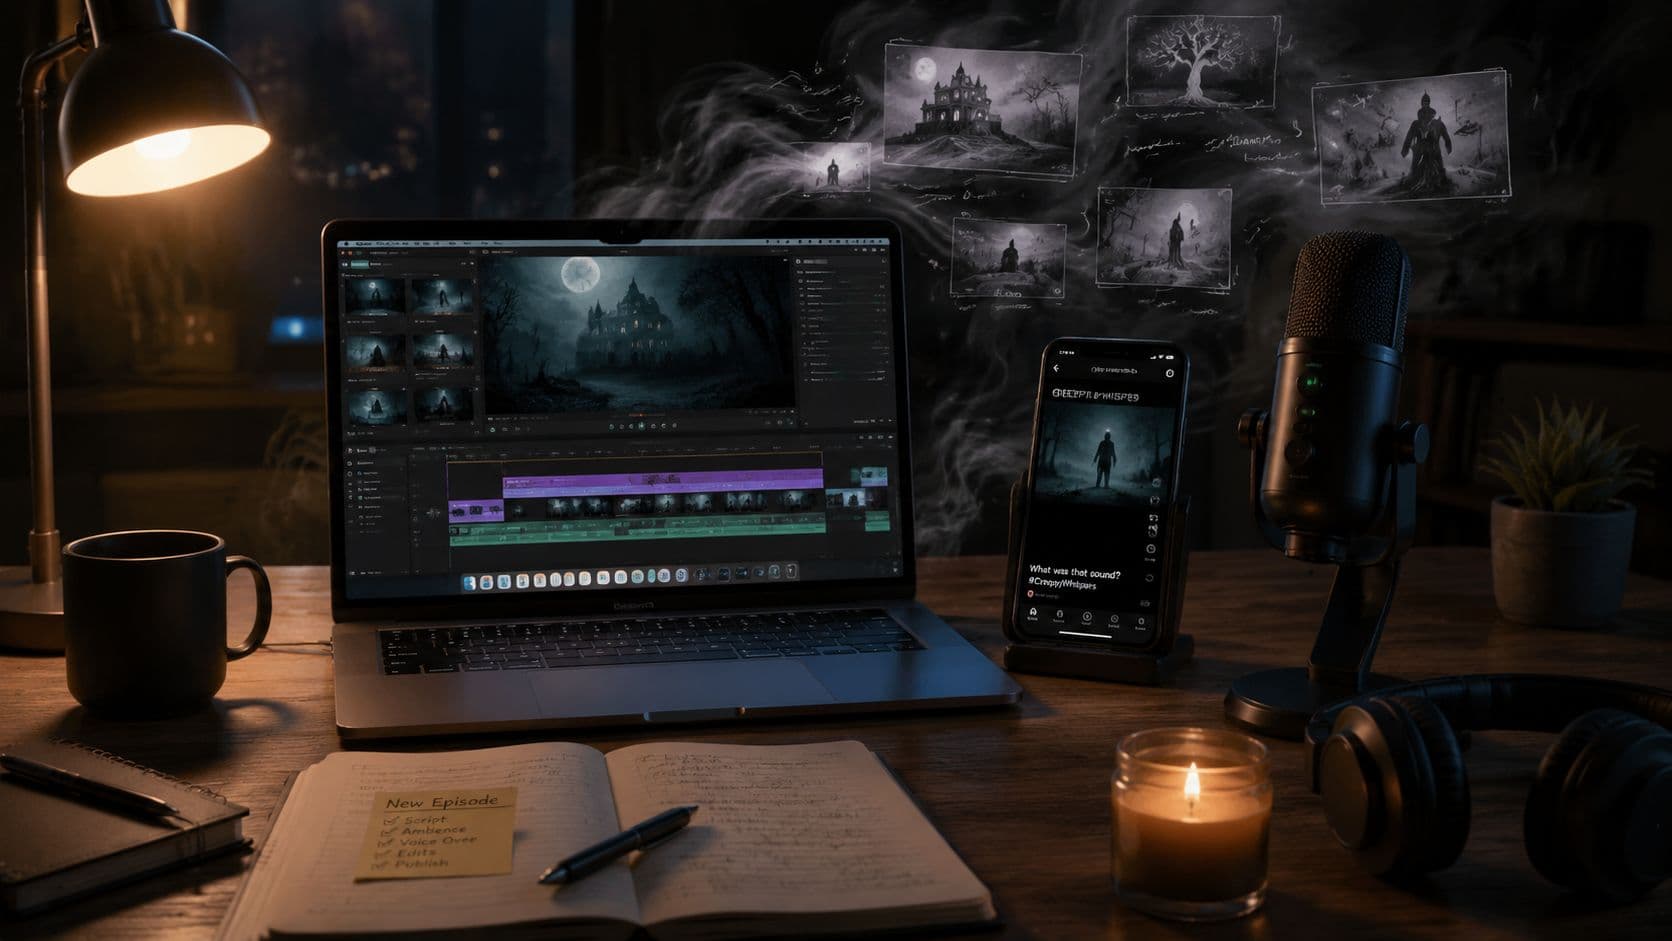
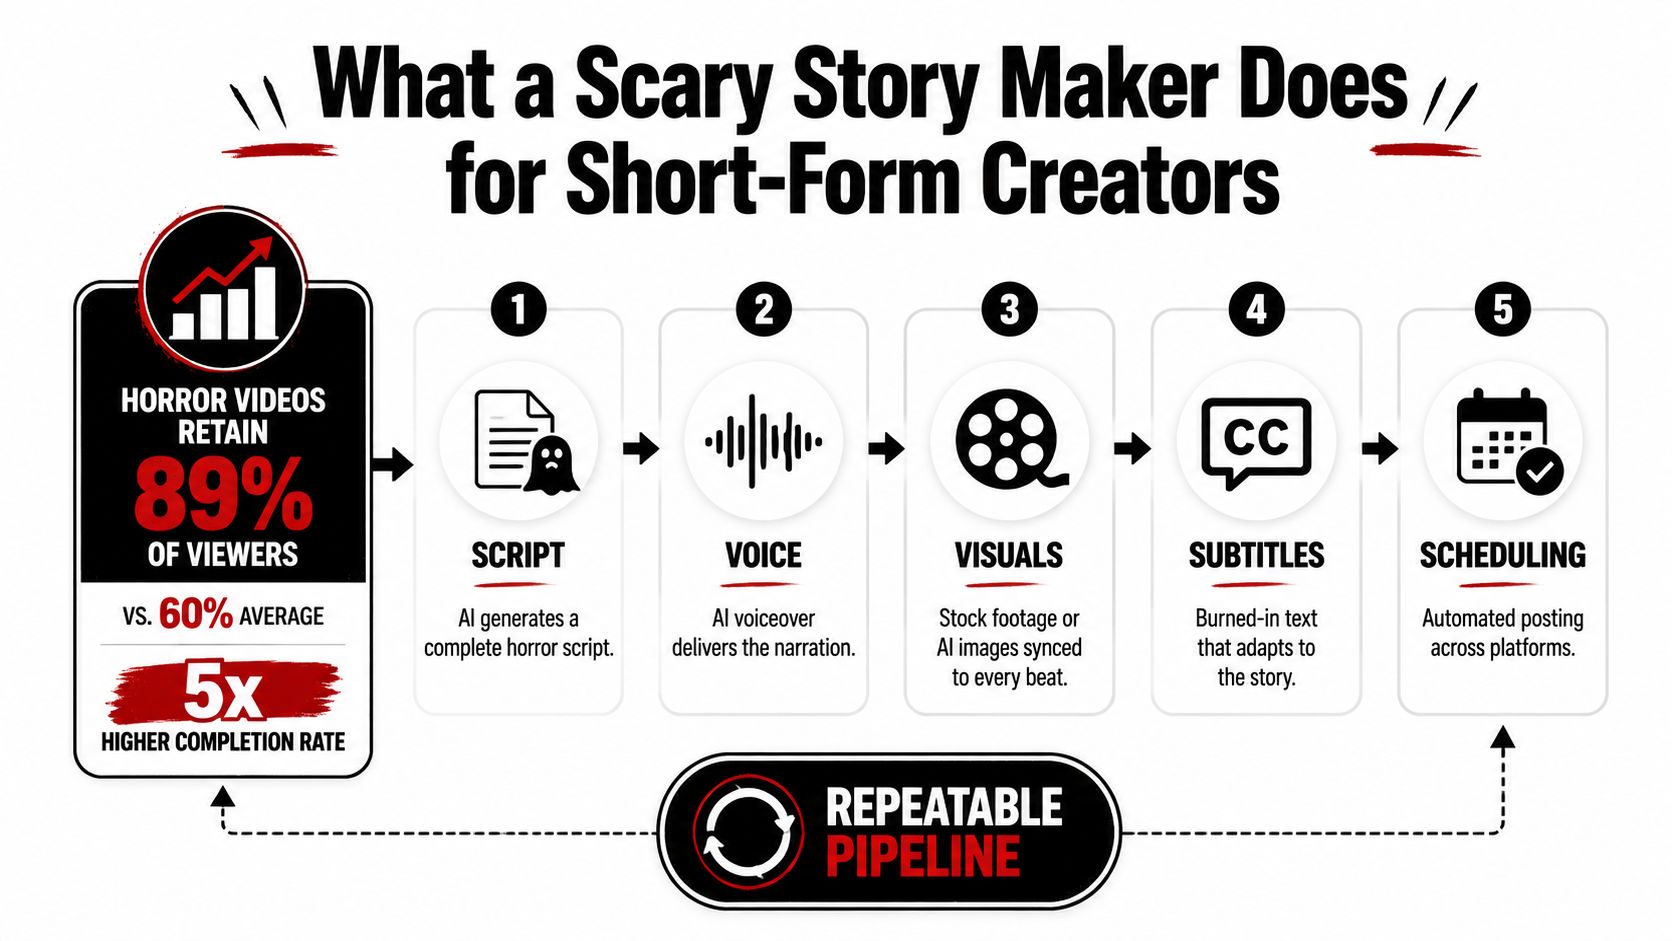
A practical pipeline connects five stages:
- Script: Generate a compact story with a cold open, escalating uncertainty, and a clear payoff.
- Voice: Keep one narrator profile, using deliberate pauses and controlled shifts in intensity.
- Visuals: Match images, footage, or simple motion treatments to each story beat.
- Subtitles: Burn in accurate captions that stay readable without covering the reveal.
- Scheduling: Export a consistent master and publish natively across your chosen platforms.
Generic AI writers often stop after the script. They can produce vivid prose, yet they usually do not retain production rules, such as a restrained first-person narrator, a familiar opening rhythm, or a recurring character who has already encountered the same cursed object. A publishing-focused scary story maker stores those decisions as repeatable settings.
Practical rule: Set the series voice, episode length, visual style, and ending type before generating the story.
Short-form horror depends on emotional compression. A controlled study found that horror texts were read more slowly and recalled better than neutral or erotic texts. Another experiment found higher self-reported arousal, larger pupil size, and increased transportation during engagement with horror material (study on cognitive engagement during horror reading and listening). For a 60 to 90 second episode, introduce uncertainty early, then give viewers a clear chain of cause and effect before the final turn.
Use the same publishing discipline described in this advice on compelling campaign content. Every beat needs a job, whether it establishes the threat, creates a question, or delivers the payoff.
Choosing Templates or Custom Prompts for Your Scary Story Maker
Templates reduce decision fatigue. Custom prompts create differentiation. The right choice depends on whether you're still learning the format or already know the exact world, narrator, and audience you want to build.
A template such as a haunted hotel log, a cursed object, a missing-person post, or a creepy online advertisement gives you a reliable skeleton. You can change the setting and threat while preserving the rhythm that makes the format easy to recognize. For a new channel, that consistency is useful because it lets you focus on editing, voice, and audience signals instead of reinventing plot structure every time.
Custom prompts become more valuable once the format starts sounding interchangeable. A custom brief can define a recurring night-shift narrator, a local folklore angle, a fictional archive, or an episodic mystery that develops over several posts. Existing scary story maker coverage often emphasizes tone, setting, subgenre, word count, and twist endings, but the more important workflow question is whether the system can preserve a brand voice and character continuity across episodes (QuillBot's AI horror story generator overview).
Use a fixed prompt spine
A reliable prompt should constrain the generator without flattening the story. Use this structure:
- Series identity: “Write in the established voice of a calm, skeptical night-shift narrator.”
- Episode premise: Define one threat, one location, and one immediate human objective.
- Cold open: Start with a disturbing fact or action that creates a question within the first few seconds.
- Scene beats: Organize the story by timestamp, with each beat changing the narrator's understanding.
- Escalation: Add evidence, not random shocks. Each new detail should narrow the possible explanations.
- Mid-roll turn: Introduce a discovery that changes the meaning of an earlier detail.
- Payoff: Resolve the immediate danger while leaving one precise, unsettling implication.
- Continuity: Keep the narrator's vocabulary, emotional restraint, recurring characters, and visual references consistent.
The prompt should request present tense and a single narrator unless your format specifically needs dialogue. Multiple voices often create production friction and make a faceless channel feel less coherent.
Templates vs Custom Prompts When to Use Each
| Criteria | Viral Templates | Custom Prompts |
|---|---|---|
| Starting point | Best for testing familiar structures quickly | Best for developing an original series premise |
| Production speed | Faster because the narrative shape is already defined | Slower because the brief needs more direction |
| Brand identity | Can sound generic without strong recurring details | Gives you tighter control over voice and continuity |
| Audience learning | Helps you understand which horror setups attract responses | Helps you build around a specific sub-niche or fictional world |
| Episode development | Works well for standalone stories | Better for sequels, recurring characters, and serialized clues |
| Main risk | Repetition and predictable endings | Vague output, unnecessary exposition, and inconsistent tone |
Before writing a long custom prompt, define the variables you'll reuse: narrator, location, fear, forbidden action, and payoff. Then change only one or two variables per episode. That creates familiarity without producing carbon copies. For more ideas on structuring prompts for video generation, use this guide to AI video prompts.
Pairing Voiceover and Visuals for 60 to 90 Second Pacing
A script can be frightening on the page and still fail as a short video. The voiceover has to carry the emotional timing, while the visuals need to reinforce the information without revealing the answer too soon.
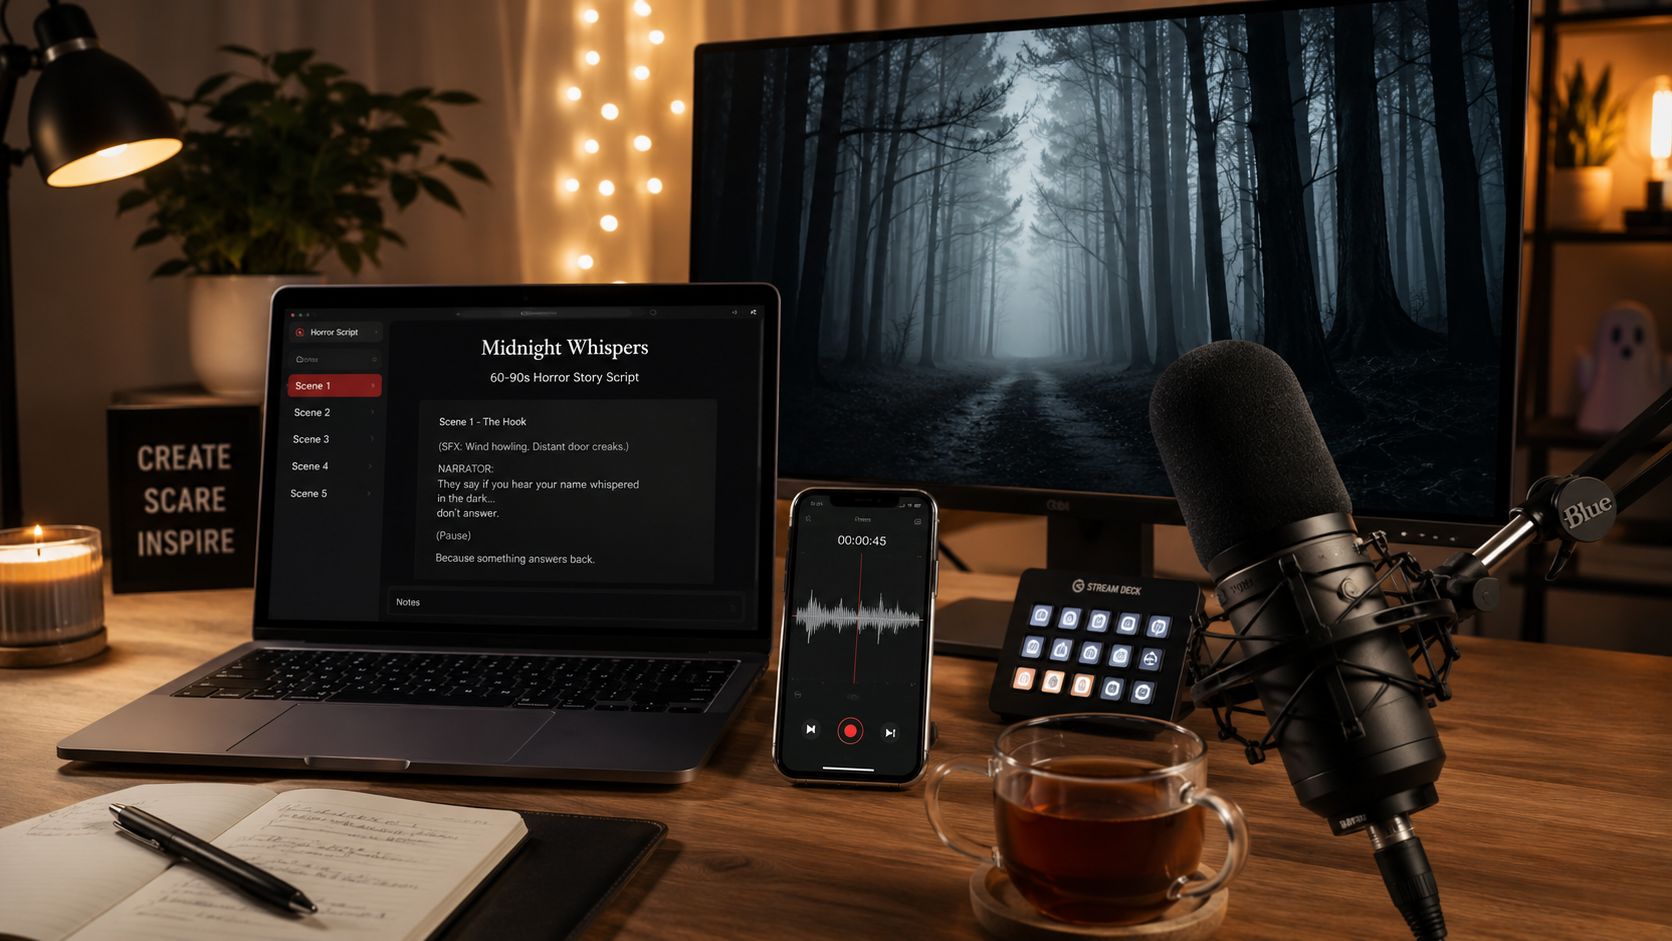
Start with a voice preset that sounds controlled rather than theatrical. Horror narration usually benefits from a measured baseline, a slightly quicker pace during physical danger, and longer pauses before evidence or reveals. Avoid making every sentence breathy. Constant intensity removes contrast, and without contrast the viewer has no sense that the threat is getting closer.
Edit by beats rather than paragraphs
Break the script into visual beats, not conventional paragraphs. Each beat should answer one question and create another.
- Opening beat: Begin with the most unusual consequence, then make the viewer ask what caused it.
- Orientation beat: Establish who is speaking, where they are, and what they need.
- Pressure beat: Add a sound, object, message, or physical change that removes a safe assumption.
- Turn beat: Place the central discovery around the middle of the runtime, so the story renews attention instead of drifting.
- Final beat: Deliver the consequence clearly, then end on a detail that invites interpretation.
Change the image or shot when the information changes, not because a timer says so. A locked hallway, a phone screen, a hand near a door, and an empty chair can all work if each image corresponds to a new piece of evidence. Reusing the same character reference, clothing, lighting logic, and environment across episodes makes the channel feel like a series rather than a stream of unrelated AI images.
Cuts should follow sentence breaks or meaningful pauses. Let the image lead the narration slightly when you're introducing an object or location, so the viewer has time to register it before the voice explains its importance. During a reveal, do the opposite. Hold the visual long enough for the line to land, then cut on the consequence.
For voice selection and narration control, this guide to AI text-to-speech voice tools is a useful production reference. The key isn't selecting the most dramatic voice. It's selecting one you can reuse without breaking the identity of the series.
A short video also needs a script that fits its intended runtime after pauses, subtitle timing, and visual holds are included. Generate a draft, record it, and cut any line that repeats information already visible on screen. Exposition is the first place retention usually leaks.
Here's a video reference for the practical relationship between narration, recording, and visual assembly:

The final check is simple. Watch the edit with the sound off, then listen with the screen covered. If the visuals don't communicate the progression and the narration doesn't maintain a clear question audibly, the two tracks aren't doing enough work together.
Adding Subtitles and On-Screen Hooks That Lift Retention
Subtitles serve more than accessibility in horror shorts. They direct attention, reinforce the narrator's key words, and give viewers watching without sound a clear path through the story. Across TikTok, YouTube Shorts, and Instagram Reels, readable text also helps preserve the episode's voice when viewers encounter it in a fast feed.
Generate captions with CapCut, Descript, or your editor's native tool, then correct every line manually. Horror relies on exact wording. A transcription error can break the logic of a clue, spoil a reveal, or turn a threatening sentence into nonsense. Keep the spelling of invented locations, character names, and supernatural terms consistent across episodes so the scary story maker produces a recognizable series voice.
Split captions for breathing room
Break full sentences at natural breaths and moments when the viewer needs to process an image. Keep captions short, usually within one or two lines, and use a heavy sans-serif typeface such as Impact or Montserrat Black. A dark stroke or strong shadow keeps words readable over bright windows, pale faces, and moving footage.
Place the main subtitle block in the lower third while protecting the area where the scare occurs. If a hand appears behind the narrator, leave that hand visible. Reserve open space during the setup, then let the frame become visually aggressive when the payoff arrives. Caption timing should follow the 60 to 90 second pacing of the episode, with enough time to read each line without slowing the narration.
Treat hooks as visual punctuation
Short scene-change hooks can restore attention at the start of a new beat:
- “DON'T.” for an instruction the narrator ignored
- “TOO LATE.” for an irreversible action
- “THIRD EYE.” for a supernatural clue
- “LOOK AGAIN.” for a visual contradiction
- “NO SIGNAL.” for isolation or failed escape
Use one or two words, show them prominently during the opening moment of the beat, then return to the regular subtitle position. The hook should add tension and leave room for the narration to develop the threat.
Captions exist to clarify the threat and reinforce tension, not to serve as visual decoration.
Export an SRT for correction and archive it with the episode project. Burn the corrected subtitles into the vertical render so the video remains readable when platform caption behavior changes. Use light text with a dark outline on dark footage, and dark text inside a light box when the background is bright. Automatic platform captions alone are unreliable when names, invented locations, and supernatural terms drive the plot.
The editing mechanics matter because horror loses force when viewers must decode the screen. This guide to adding subtitles to a video covers the practical caption workflow. Every caption must support comprehension or tension, not merely fill screen space. Proper timing and consistent hook treatment let the scary story maker carry the same publishing identity from one episode to the next.
Scheduling and Auto-Publishing Across TikTok, YouTube, and Instagram
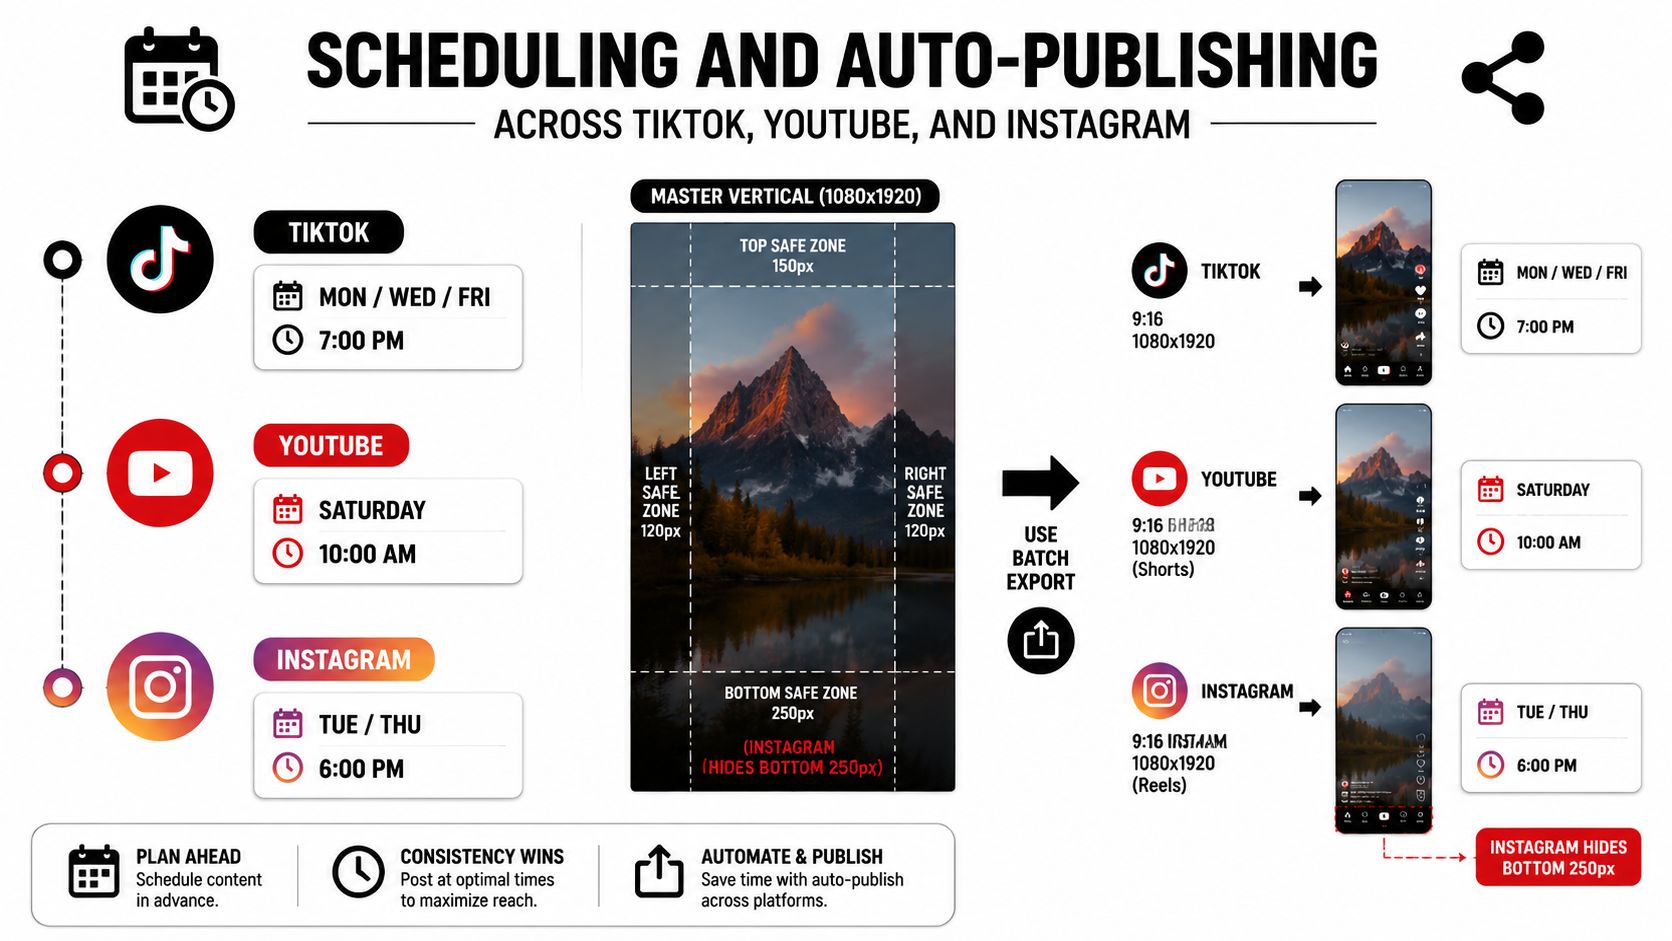
Build each generated episode into a batch-publishing workflow. Export one clean vertical master, then prepare platform-specific captions, descriptions, and upload metadata without watermarks or repost links. Keeping the narrator description, recurring terms, and visual references consistent across the batch helps returning viewers recognize the series from episode to episode.
A 1080x1920 master provides the standard vertical canvas for short-form platforms. Keep important text and faces away from interface areas, especially the lower edge, where captions and controls can cover the story. Add a safe-zone overlay to the editing template, then remove it before export.
Give each platform its own packaging
Keep the core video largely consistent, then customize the surrounding copy for each platform to match audience expectations:
- TikTok: Lead with a short premise and direct question, then use relevant horror tags such as
#scarystoryand#horror. Ask viewers to identify what the narrator missed. - YouTube Shorts: Make the first line a hook question. Follow it with a concise description that names the premise without explaining the ending.
- Instagram Reels: Use a compact cliffhanger in the caption and keep hashtags selective. Choose a cover frame that communicates the threat while the video is paused.
A comment prompt can work well on TikTok, while YouTube benefits from a clear premise and Instagram often depends on the cover and caption to earn the initial play. Match the packaging to that viewing context.
Stagger releases so each platform gets a clear test window instead of launching everywhere simultaneously. Later, Buffer, and Metricool can queue a batch. You should still verify cropped text, missing audio, and incorrect captions in the native upload result on every platform.
Track first-hour retention, rewatches, comments, and shares together. A story with fewer initial views can still justify another version when viewers stay through the ending and debate its meaning. Re-queue strong concepts with a changed opening line rather than a duplicate upload.
ClipCreator.ai can generate faceless short videos from a scary-story template or custom prompt, combining narratives with images, voiceovers, and subtitles, while supporting scheduled publishing across TikTok, YouTube, and Instagram. Keep the prompt library, visual references, and performance notes organized outside the platform so each episode can retain the same voice and pacing.
Troubleshooting, Mistakes to Avoid, and a 14-Day Launch Plan
Most weak horror channels fail due to small production inconsistencies that reach the audience: scripts that run long, voices that drift from visuals, captions that cover key images, and episodes that sound like different channels. A scary story maker only becomes a publishing pipeline when those details stay consistent across episodes and platforms.
Set hard constraints before generating, then review every export with the same checklist.
Correct the problems that viewers notice first
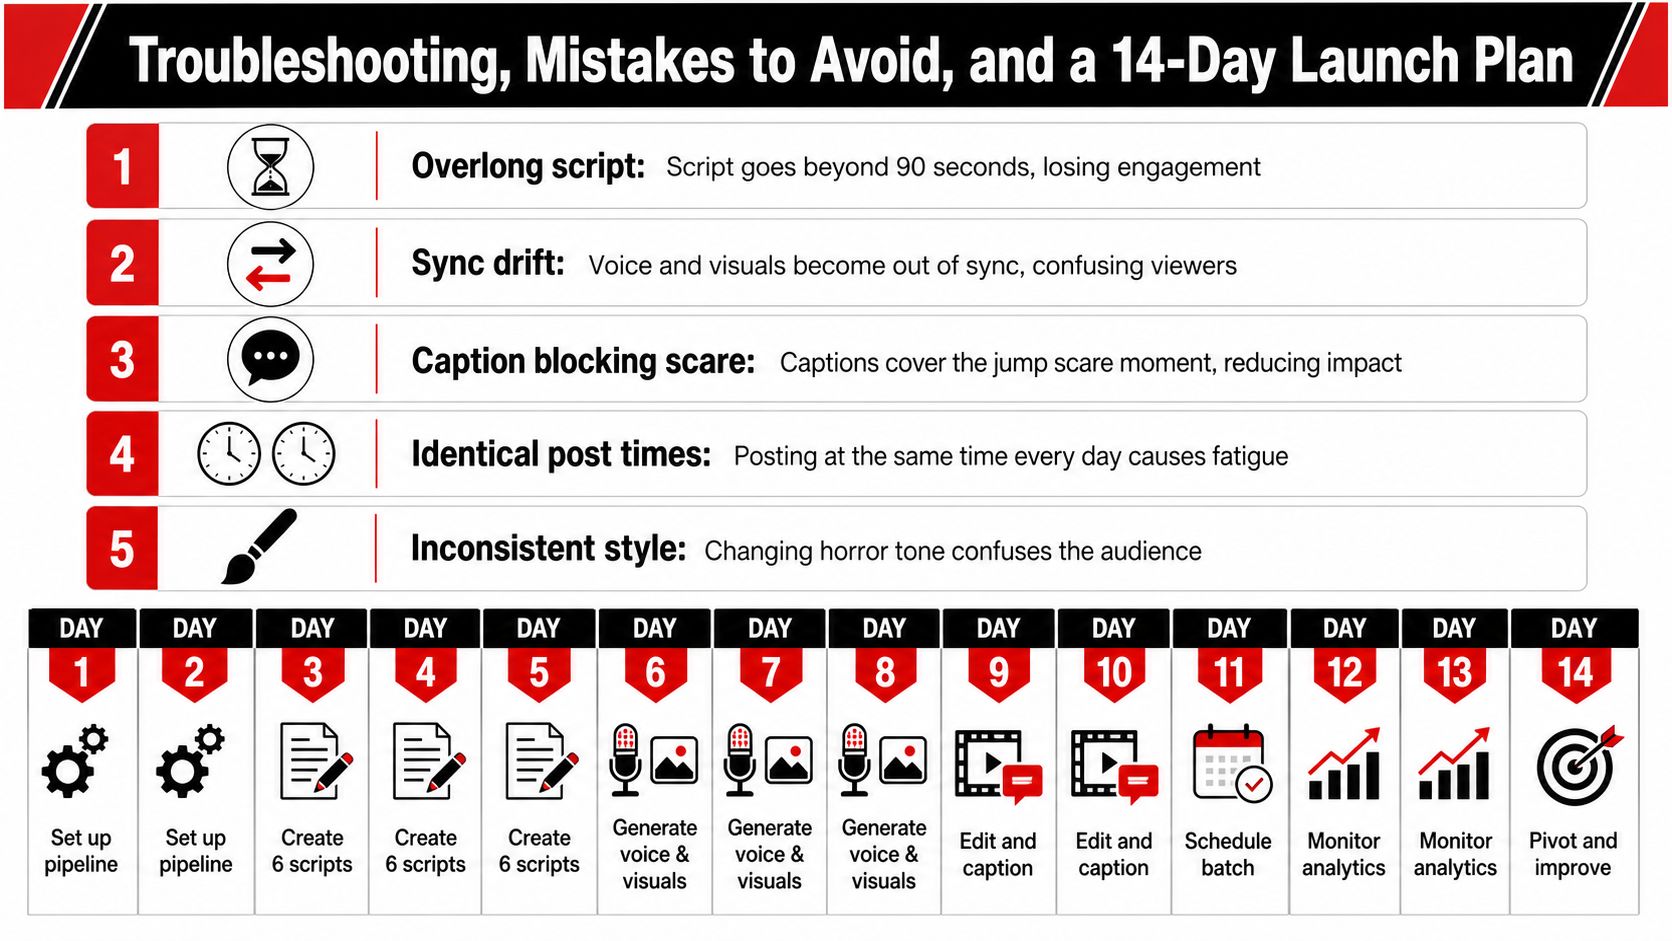
Overlong scripts create a slow middle and rushed ending. Set an internal ceiling below the maximum runtime so 60 to 90 second videos still have room for pauses, subtitle holds, and a clean final beat.
Sync drift makes the narrator describe an image that has already disappeared. Place scene changes on meaningful sentence breaks, then preview the edit once with audio only and once with visuals only.
Caption collisions can hide the object, expression, or movement that carries the scare. Move captions before changing the shot. The frame usually needs more breathing room, not more effects.
Identical packaging makes uploads feel disposable. Keep the series voice stable, but rotate the opening image, first sentence, and caption question. The hook should establish the threat quickly, then withhold enough information to earn the next few seconds.
Inconsistent style confuses returning viewers. Save a style sheet covering the narrator description, vocabulary, recurring characters, image treatment, subtitle settings, pacing rules, and preferred ending pattern. Reuse those settings in every prompt, then adjust only the story-specific details.
A practical 14-day launch sequence
Use the first two days to choose one sub-niche and finalize the narrator prompt. Keep paranormal investigations, dark history, urban legends, and fictional diary entries separate until the audience recognizes a repeatable voice.
On days three through five, write a batch of episodes using the same structure. Days six through eight are for voice generation, image selection, scene assembly, and continuity checks. Use day nine to build a reusable library of subtitle treatments, opening hooks, sound beds, and cover frames.
Publish the first episode across selected platforms on day ten. During days eleven through fourteen, release consistently while reviewing retention graphs and qualitative responses. Save opening lines that produce strong completion or thoughtful comments, but do not treat one threshold as universal. Audience, platform, and story length change the benchmark.
Launch discipline: Build enough finished material to keep publishing while you learn. Stopping after the first promising upload leaves an anecdote, not a channel system.
Research on an arXiv corpus indicates that scary-story creation can operate at substantial volume. Independent YouTube analytics also show that horror storytelling has reached large creator-business scale. Scary Stories is reported at 223K to 224K subscribers and 27.36M to 28.05M total views, while IMR Scary Tales is reported at 1.24M subscribers and 290.46M total views, according to Scary Stories YouTube analytics. Those figures do not guarantee results for a new channel. They show why a repeatable process is worth building instead of treating each story as a one-off experiment.
ClipCreator.ai can turn finalized horror prompts into faceless short videos with generated scripts, story-aligned visuals, voiceovers, subtitles, and scheduling support. Use ClipCreator.ai to build an initial batch and test the complete workflow across TikTok, YouTube, and Instagram. Keep prompts, visual references, and performance notes outside the platform so every episode retains the same voice and pacing.

Create your first video in under 2 minutes
Pick a niche, and ClipCreator.ai generates and auto-posts faceless videos to your channels every day.
Join ClipCreator.ai