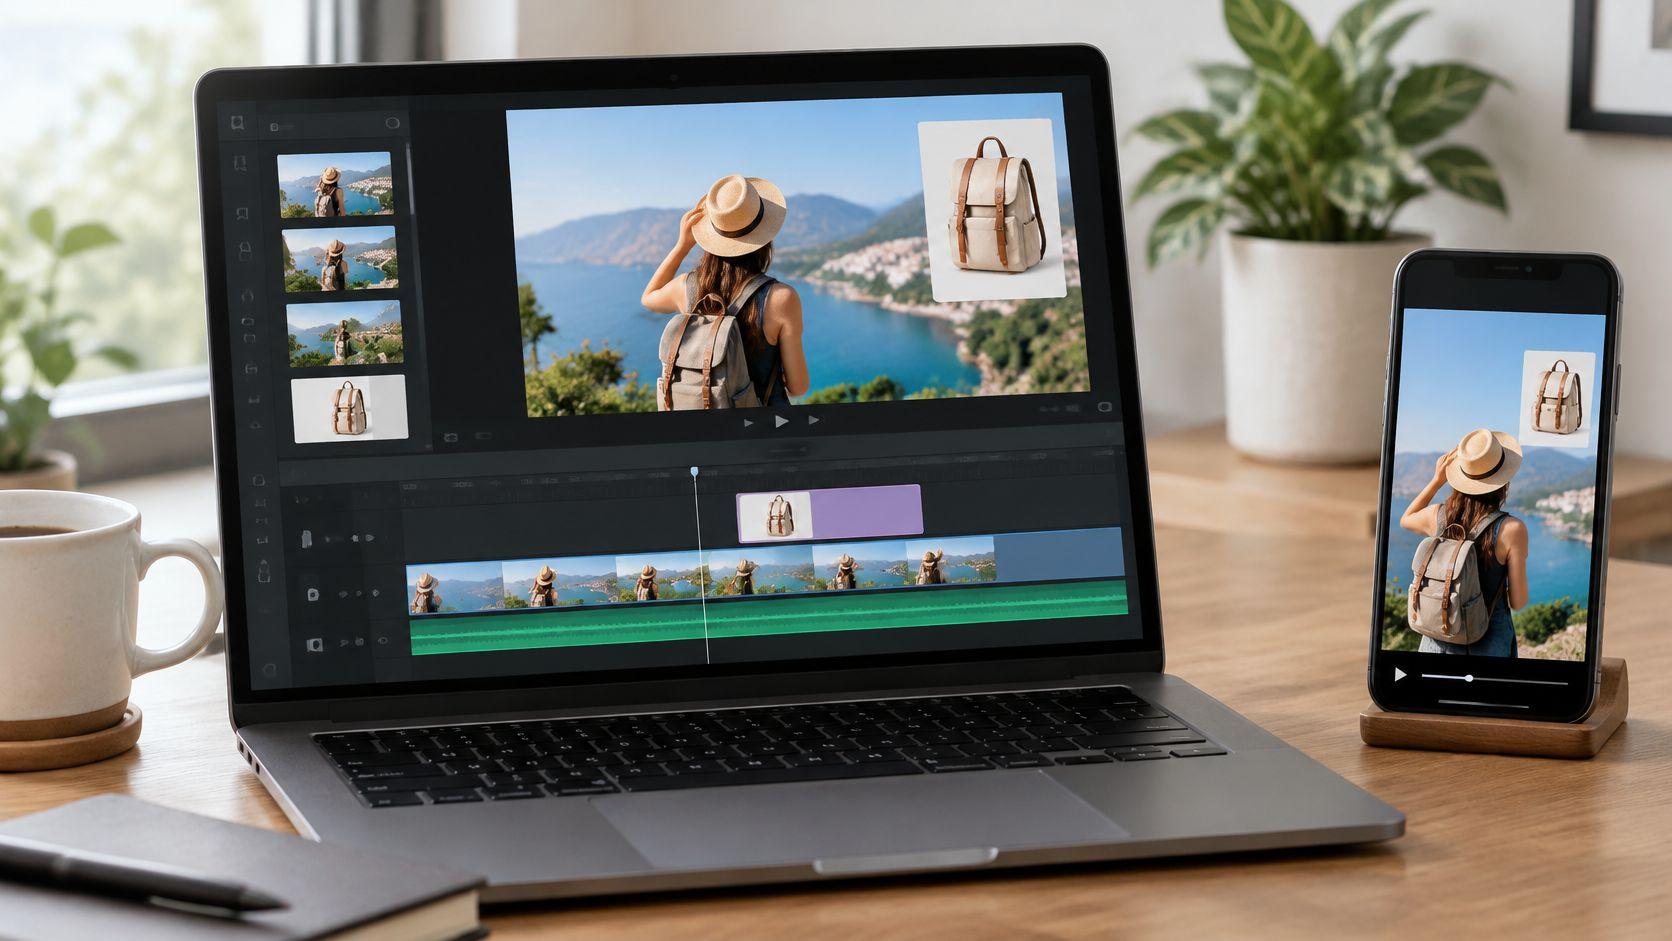
You've dragged a product photo onto your video, resized it, and found a spot that looks clean in the editor. Then you watch it on your phone. The captions cover the label, the platform's buttons crowd the image, and the product disappears before the narration explains it.
The mechanics behind an “add image on video” edit are straightforward. The harder job is making the picture useful inside the interface viewers see. Treat the overlay as a layout decision, not just another file on the timeline.
Choose Overlay Size and a Clear Position
Overlay size and safe position by video format
| Format | Canvas | Corner overlay size | Keep clear |
|---|---|---|---|
| Vertical 9:16 for TikTok, Reels and Shorts | 1080×1920 | Up to about 25% width and 15% height | Top 120 px, bottom 300 px, right 96 px for YouTube Shorts |
| Landscape 16:9 | 1920×1080 | Up to about 25% width and 15% height | Faces, subtitles, player controls and essential action |
| Full-screen 1080p overlay | 1920×1080 artwork | Full frame | Reserve space within the artwork for captions and essential text |
The canvas dimensions and approximate corner-graphic limits above follow Pippit's image-overlay guidance; treat the limits as a starting point for supporting graphics, not a restriction on an explanatory product shot. The Shorts padding values are interface estimates from the Trustiify YouTube Shorts safe-zone checker, and the bottom obstruction can increase when viewers expand the description.
Start with the delivery canvas, rather than enlarging a small image until it fills the preview. A low-resolution product thumbnail won't gain detail when you stretch it. Prepare artwork with enough resolution for its intended display size, use a transparent PNG for a logo or cutout, and lock its proportions.
Choose the video's shape before positioning anything. If you're deciding between portrait and widescreen versions, use our video aspect ratio guide before building the layout. Changing the canvas after placing graphics creates unnecessary repositioning work.
Match the size to the image's job
A badge identifies the brand and usually belongs in a corner. A product shot that explains a feature needs more room, often toward the middle of the composition, where viewers can inspect it without searching. If the image merely supports the narration, keep it subordinate to the main action.
Don't confuse a large image with a useful image. A package photograph with tiny printed instructions may remain unreadable even after enlargement. Crop to the relevant detail or replace the embedded wording with clean editor text.
Run these placement checks
- Leave the face and subtitle area free. Scrub through the footage while the overlay is visible, because a speaker can move into an initially empty space. Reserve the lower caption area before deciding where the picture belongs.
- Try middle-left or upper-middle for branding. These positions can avoid busy edges, but they aren't universal safe spots. Choose the position that leaves the subject and destination interface unobstructed.
- Keep branding off automatic captions. Test with the captions enabled, not with an empty placeholder track. A logo that looks balanced before transcription can become a distracting mark behind the words.
- Read image text at phone size. View the composition without zooming in or leaning toward the display. If the viewer must choose between reading the subtitle and understanding the image, move or simplify the image.
Practical rule: A centered image can still be badly placed. Alignment doesn't establish visibility.
Check the design against each destination's interface, rather than assuming one platform's preview represents every feed. A product label can sit comfortably inside the frame yet land beneath engagement controls. Use a mobile-sized preview with those controls represented, and judge the entire composition, including captions, not the graphic in isolation.
Add an Image to a Video in Five Steps
Say you have a short product clip and a product photograph. The photograph should appear in the middle of the story, when the narrator explains the feature, rather than sitting over the opening shot.
Most timeline editors, including Adobe Premiere Pro, DaVinci Resolve and CapCut, use the same basic arrangement: background footage underneath, visible overlays above. Button names differ, but track order, scale and duration are the controls that matter.
The process below keeps those decisions separate so you can fix the right problem.
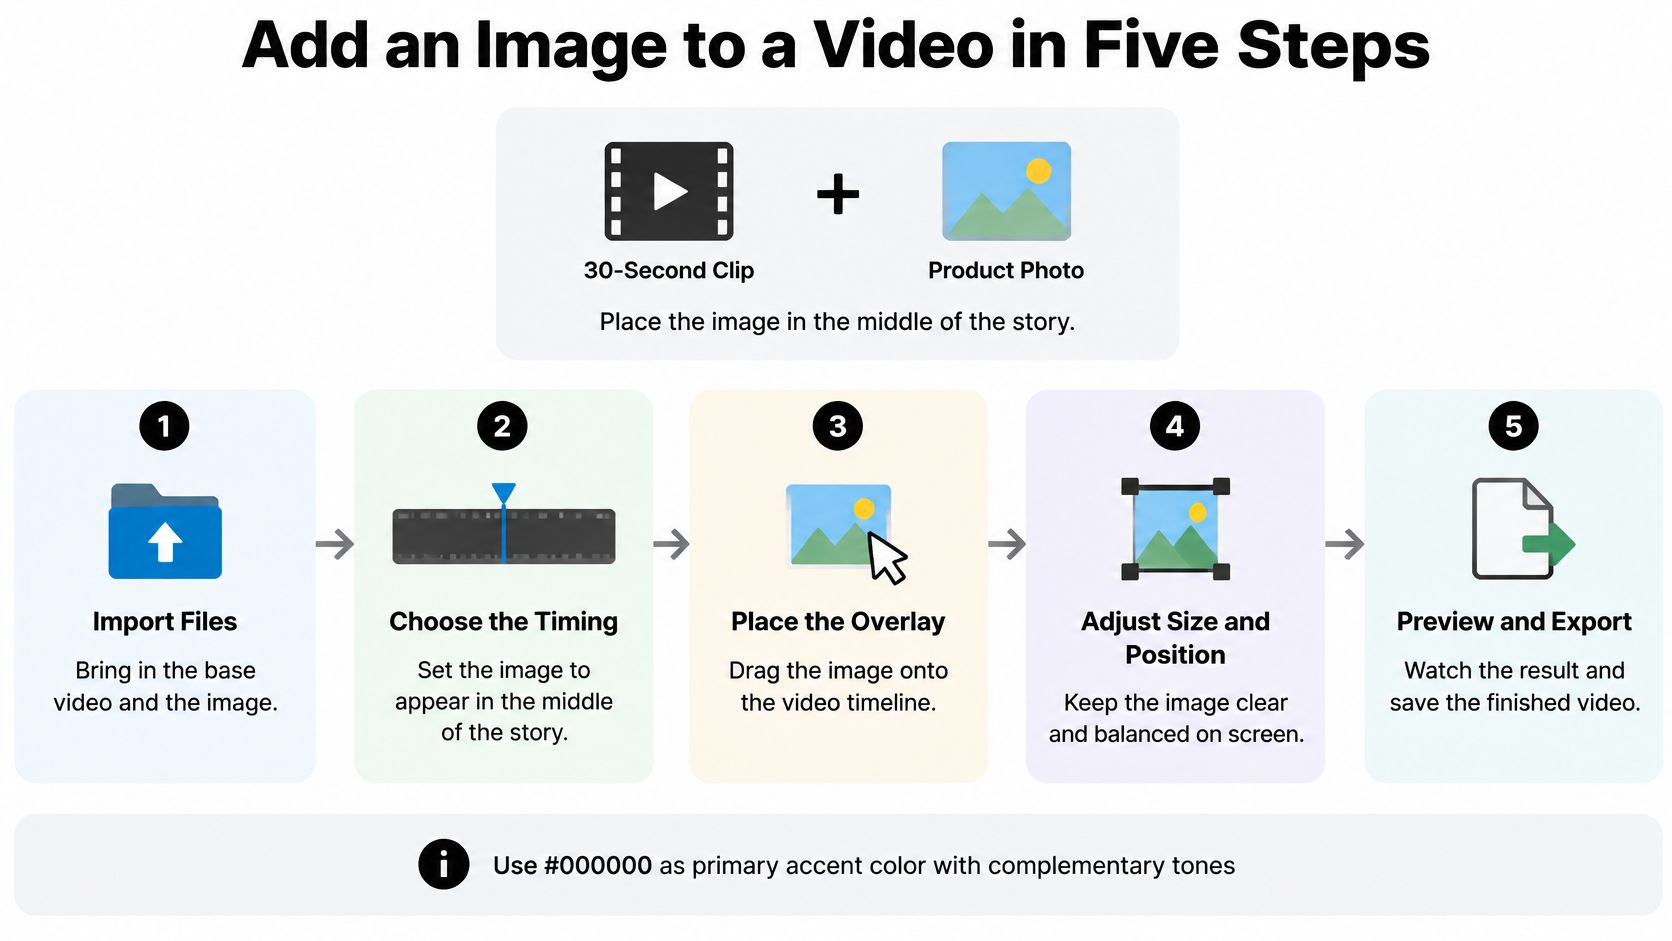
- Import the video and image. Bring both files into the media library, then place the base video on the timeline so you have the story underneath your edit. Importing makes an asset available but doesn't necessarily make it visible in the sequence; the common mistake is leaving the photograph in the library.
- Put the image above the footage. Drag it onto a higher video track, or use the mobile editor's Overlay command, so it composites over the background. If you can select the image but can't see it, check the track stack; the common mistake is placing it beneath an opaque video.
- Resize without changing its proportions. Select the image, enable the aspect-ratio lock, and drag a corner handle while watching the product's shape. Adjust position separately from size; the common mistake is stretching the photograph with a side handle.
- Trim its start and end. Move the image clip to the relevant spoken phrase, then trim its edges so it leaves when the explanation moves on. Listen across both boundaries instead of relying only on the waveform; the common mistake is accepting the editor's default still-image duration.
- Play the sequence, then export it. Watch across the overlay's entrance and exit, save the finished video, and open that saved file in a separate player. This catches differences between the working timeline and the deliverable; the common mistake is approving only the editor preview.
Keep labels separate from the photograph
If the product needs a price, feature name or short explanation, add editable text rather than baking more wording into the image. You can then revise the label without rebuilding the photograph, and adjust its contrast independently.
For an iPhone-based workflow, Veo3 AI's guide to text settings for Reels and Shorts is useful when setting up the accompanying text. Keep that label focused on what the picture cannot communicate by itself.
Finish with this checklist: the image is visible, proportional, on time and still on screen in the exported file.
Timing Your Overlay So Viewers Notice It
An MSI video-advertising study found that larger pictures appearing in five equally spaced video frames during the first 30 seconds were associated with statistically significant increases in mean attention and predicted engagement. That's an association, not a guarantee that adding more or larger pictures will improve every video.
The useful editing lesson is to give an important image a deliberate early appearance. If the product explains the hook, don't withhold it until the closing branding. If the opening depends on a reveal, however, showing the answer immediately can undermine the story.
Use the timeline to connect each picture to a specific spoken idea. The following is a hypothetical edit plan, not a schedule prescribed by the study.
Overlay timing plan for a 30-second clip
| Overlay role | Duration | Example |
|---|---|---|
| Hook image | 3 seconds, starting at 0 seconds | Product photo as the story opens |
| Story beat | 6 seconds, starting at 10 seconds | Map image when the narrator names the place |
| Closing logo | 5 seconds, starting at 25 seconds | Brand logo in the middle-right area, clear of subtitles and interface controls |
The hook image starts with the opening claim so viewers immediately know what the video concerns. The map waits for the location reference, giving the picture a clear explanatory purpose. The logo arrives after the explanation, when identification is more useful than another illustration.
A timeline view helps you compare those visual moments with the narration.
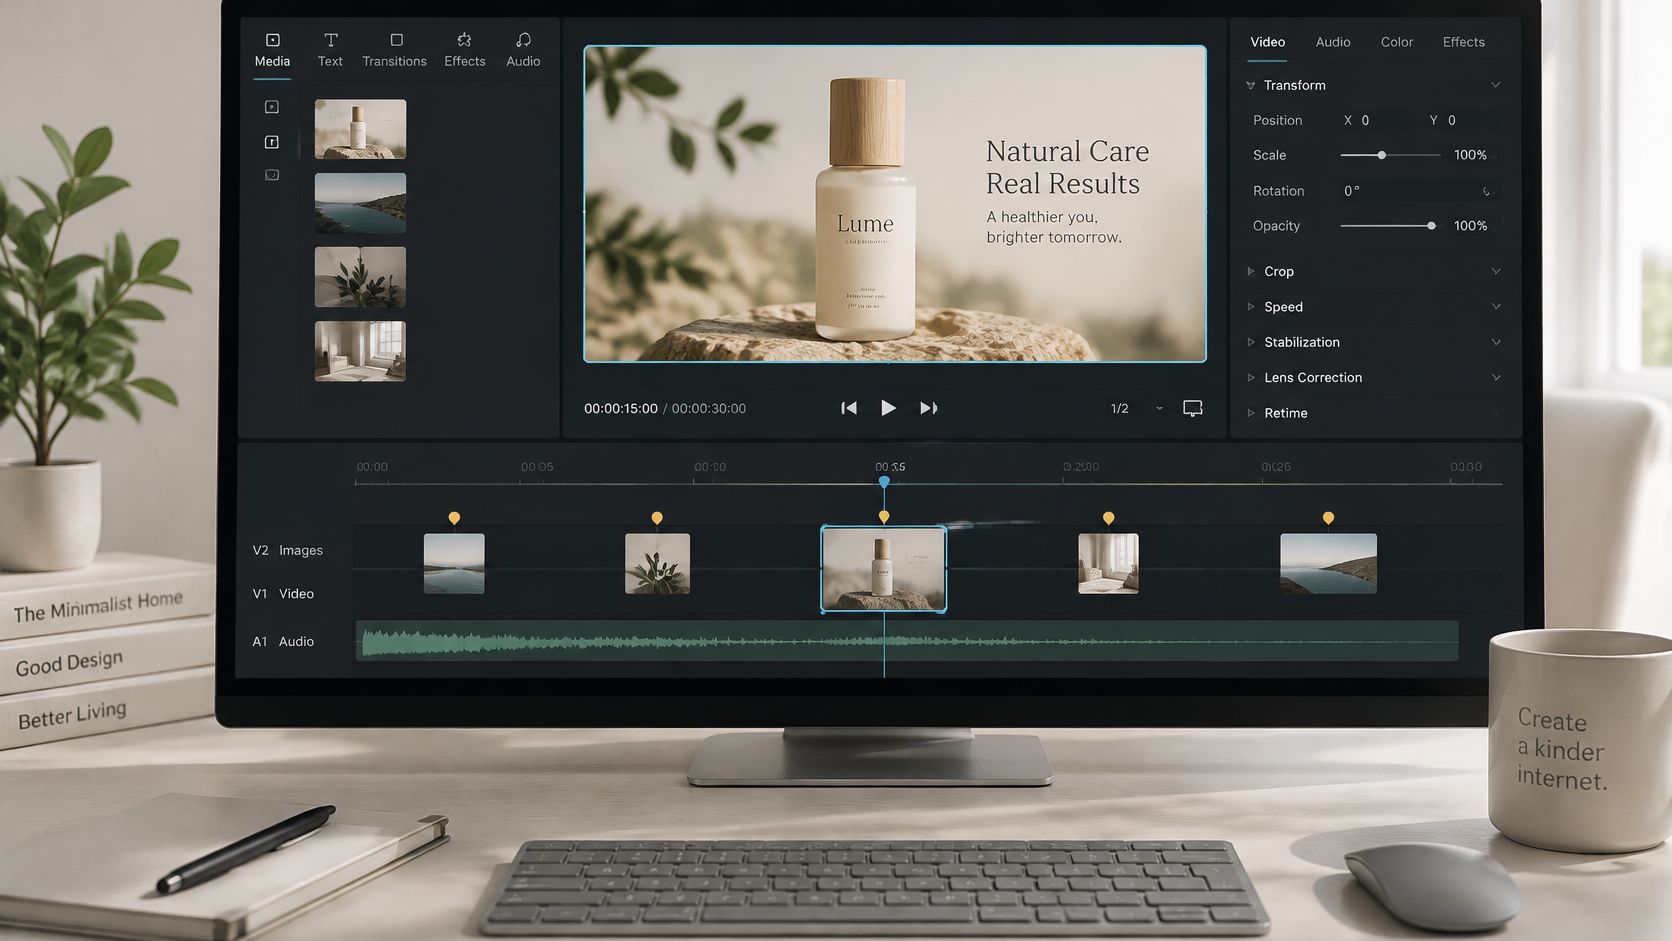
Give each appearance a reason
Don't leave a supporting static picture over the whole clip by default. Once the narration changes subject, remove it or replace it with something relevant. A persistent logo is a different choice from an explanatory image and should remain visually subordinate.
Avoid overlapping competing images in the opening moments. Viewers shouldn't have to decide which product, face or diagram relates to the sentence they're hearing.
Let the image appear when it answers a question, not simply because the timeline has empty space.
Before editing, write each overlay's start and end times in a simple list. That small planning step makes it easier to spot irrelevant holds, rushed explanations and accidental overlaps.
Why the Exported Overlay Looks Worse
A sharp editor preview doesn't guarantee a sharp delivery file. When you burn an image into video, the composite must be encoded again; it isn't a lossless image layer attached to the original footage.
Repeated intermediate exports can soften fine lettering and introduce artifacts around high-contrast edges. They also make troubleshooting harder because you're inspecting a file that has already passed through earlier compression settings.
Export problems and the single-pass fix
| Symptom | Likely cause | Fix |
|---|---|---|
| Image softer after each save | A new H.264 encode on every intermediate export | One filter graph and one final encode |
| Render much slower than a single pass | Separate export after overlay, subtitles, scale or crop | Combine overlay=x:y with those steps, then encode |
| Final file looks like a rough preview | veryfast preset and CRF 23 left on the delivery export | Treat that pair as preview settings; select final settings for the target |
Build the composite in one pass
For an automated FFmpeg workflow, keep the operations together rather than writing a new video after every change:
- Load separate inputs. Read the background video and original image directly.
- Set the position. Apply
overlay=x:yusing the chosen coordinates and the required visibility timing. - Combine processing. Put subtitles, scaling and cropping in the same filter graph, checking operation order carefully.
- Encode the finished composite. Produce the delivery file with a single final H.264 encode.
A measured local test described in Renderio's FFmpeg watermark guide, using FFmpeg 4.4.2, libx264, veryfast, CRF 23 and two encoder threads, reduced one clip's rendering time from 4.04 seconds to 1.99 seconds, a 2.03× improvement. That's a local result, not a universal production benchmark.
Test representative footage at your own resolution, duration, codec and image count. Record wall time, peak memory and output quality, because a faster render isn't useful if the label becomes unreadable.
Separate preview speed from delivery quality
Use fast settings while checking layout, then choose the final preset and CRF for the quality and turnaround you need. The preview pair in the table isn't unusable for publication, but leaving it unchanged without inspecting the result is a poor quality-control habit.
Our guide to best-quality video formats can help with the delivery-format decision. Compare the actual exported product edges and lettering, not just the background footage.
Export check: Inspect the most demanding detail in the overlay before approving the whole file.
If you also publish the source photograph on a landing page, handle that asset separately. Helbling Digital Media explains how to improve page speed with optimized images; web-image optimization isn't a replacement for video encoder settings.
Check Rights Meaning and the Phone Playback
A finished timeline still needs a publishing check. The image can look attractive and arrive at the right moment while carrying information that some viewers cannot access, or suggesting permission you haven't obtained.
Use this short routine on the actual deliverable. Keep the original asset, its permission record and the finished video together so another editor can understand what was approved.
Run the final publishing routine
- Open the finished export. Use the file you intend to upload, not a cached preview or an earlier review copy. Confirm the filename and destination version so you don't approve the portrait edit and accidentally publish a different crop.
- Watch on a phone at normal distance. Keep sound on and play without pausing. Confirm that you can identify the pictured detail while following the narration, and that the image leaves when the story moves on.
- Confirm permission and context. For commercial work, retain a license or other valid permission covering the intended use, and check that a recognizable person or product doesn't imply an endorsement you don't have. Our fair-use guidelines can help frame the review, but attribution alone isn't permission.
- Make essential meaning available beyond the picture. If a diagram introduces a fact that the spoken track and captions never mention, add that information in an appropriate accessible form. Don't add a separate description for purely decorative artwork that would only repeat what viewers already hear.
- Identify how the overlay is delivered. A picture burned into the exported frames doesn't retain its own screen-reader text alternative. A separate interactive layer may support one, depending on the player, so confirm the delivery method rather than assuming the source image's description survives export.
The distinction between burned-in images and interactive layers is explained in Alibaba's image-in-video workflow guidance. For a social-feed export, put essential visual information into the narration or accessible caption content instead of relying on image metadata.
Keep human approval in an automated workflow
For recurring faceless videos, we generate images automatically that follow each video's story closely, and we add subtitles automatically. That reduces manual assembly, but you still need to judge the phone playback, permissions and information conveyed.
Save the publishing routine beside your project template. Assign someone to approve the deliverable when working with an agency or client team, and keep revision notes specific: identify the image, the spoken phrase and the change required. That's more actionable than asking an editor to make the overlay clearer.
ClipCreator.ai offers automatically generated, story-aligned images and automatic subtitles for short-form videos. Visit ClipCreator.ai to create your next video, then use the placement and publishing checks above to make sure its visuals work on a phone.

Create your first video in under 2 minutes
Pick a niche, and ClipCreator.ai generates and auto-posts faceless videos to your channels every day.
Join ClipCreator.ai