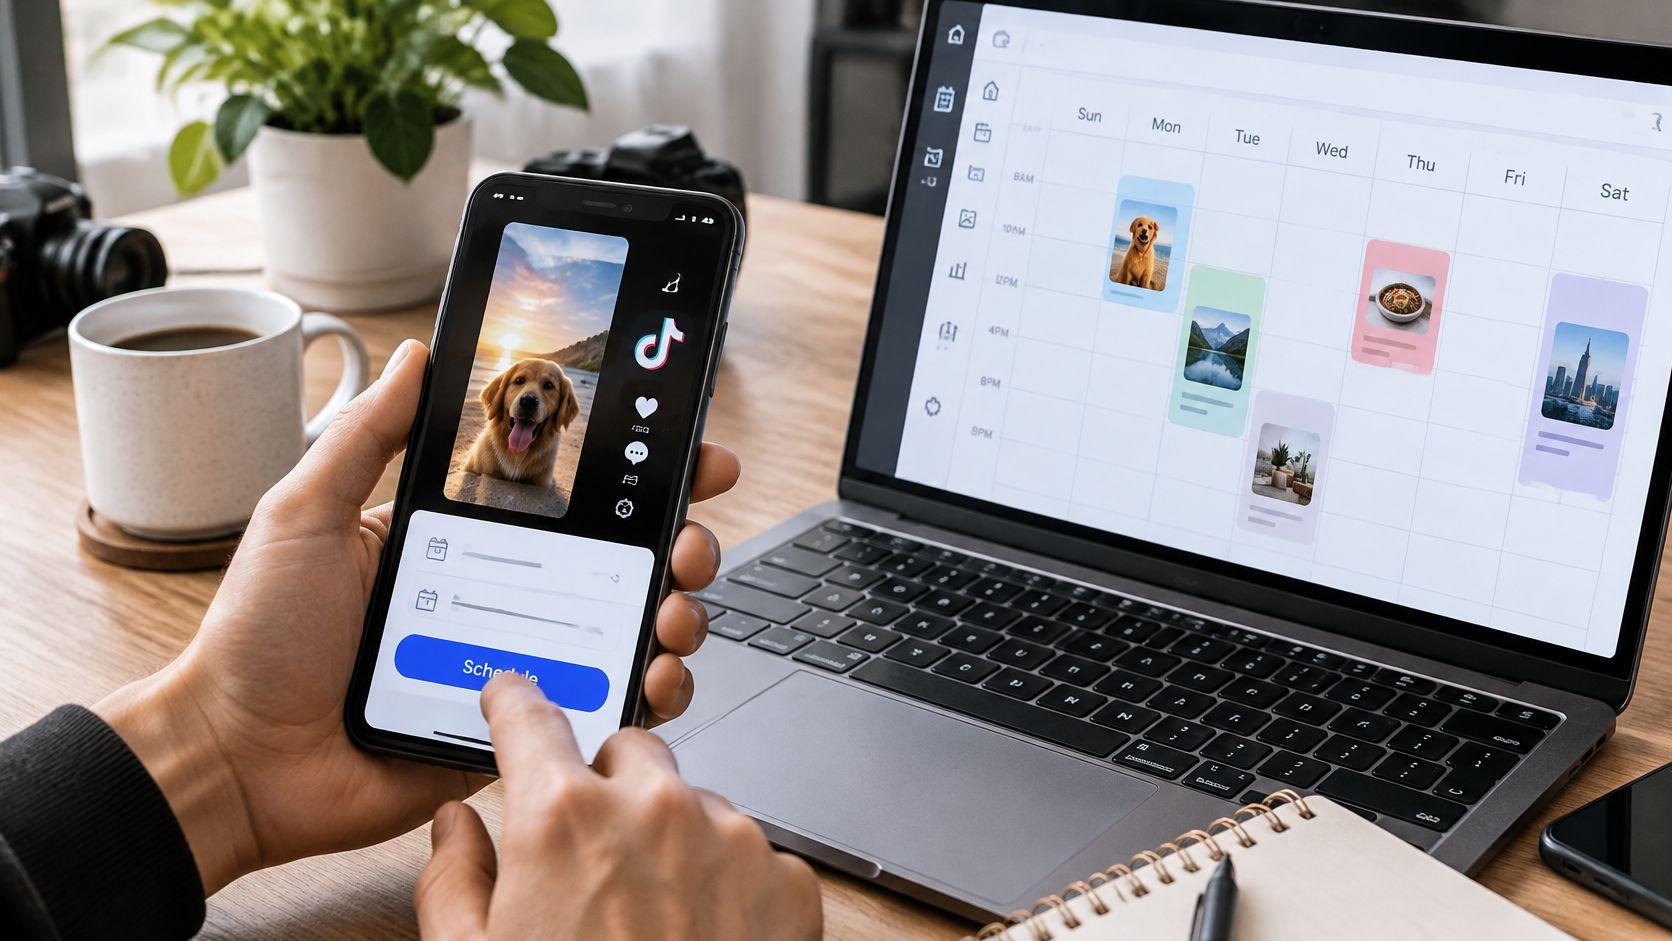
Six videos sit in a folder on your desktop. The captions are drafted, the covers are picked, and the only thing left is getting each one onto TikTok at the right hour, which is exactly the part that keeps slipping. You upload one, get pulled into a thread, come back, upload the next, and by Thursday night the batch you meant to spread across the week has gone out in a clump.
Scheduling solves that, but the native tool has three sharp edges that most tutorials skate past. It only appears for certain account types. It follows your computer's clock rather than your audience's. And once a post is queued, the caption and the time are frozen.
The workflow that survives contact with a real calendar has the same shape at three posts a week or twenty: pick a method, lock the mechanics, then test your own slots instead of copying a generic best-time chart.
Choose the Right Scheduling Method
TikTok gives you three routes to a scheduled post, and they differ in where they run and how far ahead you can plan. Match the method to your setup before you touch a single video.
| Method | Where it works | Scheduling window | Best for |
|---|---|---|---|
| Native TikTok scheduler | Web upload page, Creator and Business accounts | 15 minutes to 10 days ahead | Planning a short queue of posts with no extra tools |
| Third-party scheduling tools | The tool's own dashboard, after you connect TikTok through its authorization screen | Whatever lead time the tool sets, confirmed before your first batch | Teams and agencies managing several accounts from one calendar |
| Automated creation and publishing (ClipCreator.ai) | After a TikTok account is connected | Set by your publishing schedule | Faceless videos produced and posted at volume |
Match the method to the bottleneck
The native scheduler is free, official, and good enough for most solo creators. It handles a rolling queue of a week or so and keeps everything inside TikTok, which means no third-party connection to break and no extra subscription. If your videos are already edited and sitting in a folder, this is the end of the conversation.
A third-party scheduler earns its fee when one calendar has to cover four client accounts, or when a teammate writes captions and someone else approves them. You're paying for shared workflow and a longer runway, not for the publishing itself.
Automated creation and publishing is a different purchase. It exists because the bottleneck for most faceless channels isn't clicking publish, it's producing enough videos to fill a queue in the first place. When output is the constraint, automation with a manual review step pays for itself. When output is fine and only the calendar is messy, it's overkill.
The rule I'd apply: under three posts a week with finished files already in hand, use the native scheduler. Add a tool only when it removes work you're actually doing.
The risk nobody mentions
Automation multiplies whatever you feed it. One post at a bad hour is a shrug. The same bad hour applied across a month of automated output is a month of weak reach that you'll blame on the content.
Run your timing test before you scale, not after. And with any automated route, keep a human pass over the first few weeks of published posts until you trust the settings.
Confirm the account type first
The native option depends on your account type. Open Settings and privacy, tap Account, and check whether the profile is Personal or already Business or Creator. A Personal account never shows the schedule control, and people lose an afternoon hunting for a button that was never going to render. Switch first, then open the upload page.
How to Schedule a TikTok Video on the Web
A post scheduled for the wrong hour or with a caption typo is harder to fix than a draft. TikTok's web scheduler has a limited scheduling window, and once a post is queued, its video, caption, and publication time can't be edited. Set aside time to check the full post before confirming.
TikTok introduced its native Video Scheduler on July 16, 2021, in its business announcement. It's available on the web upload page for eligible Creator and Business accounts, from 15 minutes to 10 days ahead.
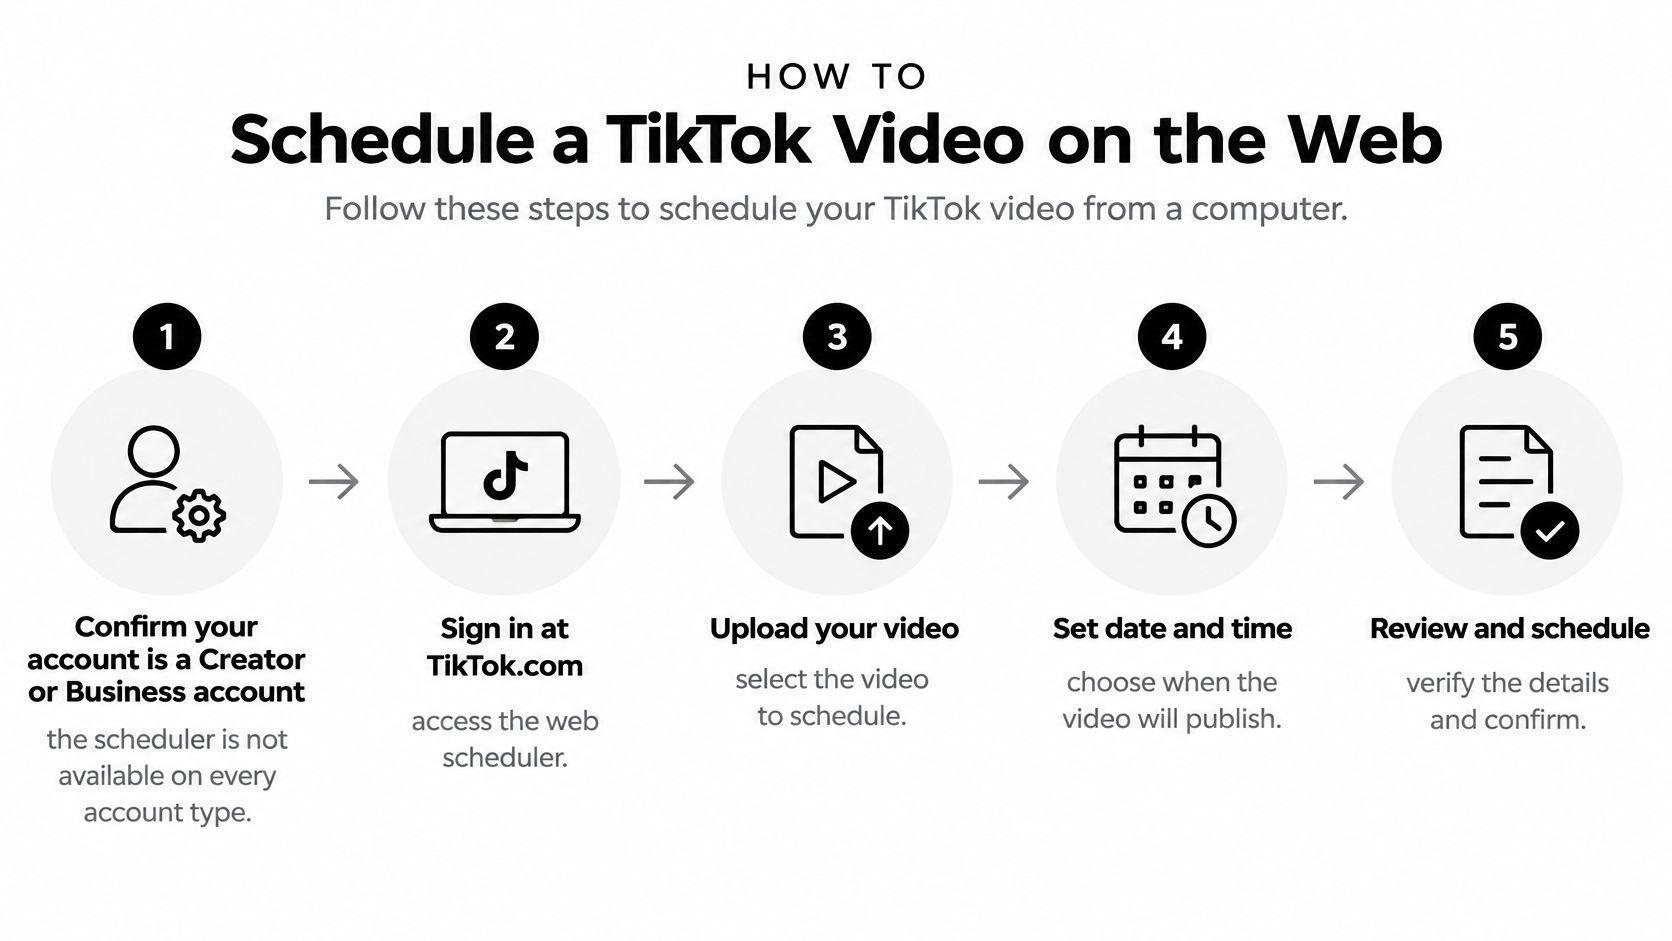
- Confirm the account type. Open Settings and privacy, then Account. If the profile is Personal, switch to Business or Creator before looking for the scheduler.
- Sign in at TikTok.com on a desktop browser. Scheduling is part of the web upload flow, not the main mobile app. Review the vertical crop on the computer before proceeding.
- Upload the finished video and make your edits. Trim the clip, add text, choose the sound, and set the cover. Treat these choices as final before scheduling.
- Write the caption and hashtags. Check the opening line, tags, and spelling carefully. A caption typo means rebuilding the scheduled post.
- Set visibility and interaction permissions. Choose who can watch and whether comments, Duet, and Stitch are available. Set branded content and AI-generated labels in the advanced settings.
- Turn on Schedule and choose a date and time. The post must be scheduled at least 15 minutes ahead and no more than 10 days ahead.
- Check the time zone before confirming. The scheduler uses your computer's default time zone. If that setting differs from your audience's time zone, the video may publish at an unintended hour.
The edit lock is easy to overlook. TikTok's announcement says the scheduled video, caption, and publication time can't be edited after scheduling. If anything is wrong, delete the post and create it again. Check the video, caption, date, and time before you confirm.
Watch the walkthrough before scheduling if you want to see the upload flow:

Fix the Scheduling Errors You Will Actually Hit
The error that wastes the most time isn't a failed publish. It's spotting a typo in a queued caption, or deciding 7 p.m. should have been 8 a.m., and hunting for the edit button. There isn't one.
Delete and rebuild. No edit control is hiding in the interface, and searching for it costs more than re-uploading the file.
The rest of the failures are quick to diagnose once you know where to look.
| Symptom | Likely cause | Fix |
|---|---|---|
| Scheduling option is missing | Account is not an eligible Creator or Business account | Confirm the account type, then reopen the web upload page |
| Video posted at the wrong hour | Scheduler uses the computer's default time zone | Set the workstation to the audience's time zone and reschedule the post |
| Caption or time needs changing after scheduling | Scheduled caption and publication time cannot be edited | Delete the scheduled post and schedule a replacement |
| Desired date is unavailable | Native window is 15 minutes to 10 days ahead | Pick a date inside the 10-day window or publish live instead |
| Scheduled video is missing from the queue | Scheduled posts are listed with drafts in the profile view | Check the drafts shown in your profile view before assuming it is gone |
| Mobile app shows no scheduling option | Scheduler sits on the web upload page, not the mobile app | Schedule from the web upload page on a computer |
The three that bite most often
The wrong hour is the most expensive because it's silent. Nothing errors, the post just lands at 3 a.m. local time for your audience. Set the workstation to the target time zone before you start a batch, and write the conversion into your notes if you're posting for a market you don't live in.
The missing option usually isn't a bug. TikTok's own scheduler documentation ties the workflow to the web upload page and to an eligible account type, which is why people assume mobile and desktop behave identically and get stuck when they don't. Feature rollouts also arrive account by account, so a fresh account can lag behind.
The vanished post is usually not gone. It's sitting in the drafts area of your profile view, waiting.
Re-check the time zone on every single batch. Most of these failures trace back to that one setting, and it resets the moment someone else's laptop joins the workflow.
Schedule Through Third-Party Tools
A third-party scheduler is the right call when one calendar has to serve several accounts or a team. The setup is short, but each step has a way of going wrong.
- Confirm the tool publishes to TikTok. Not every scheduler supports TikTok, and the ones that do may not reach every account type. If you're comparing options, this breakdown of social media scheduler comparisons covers how the major tools handle TikTok connections.
- Connect the account and check the handle. Go through the tool's authorization screen, then read the connected username back to yourself. Agencies with several client profiles connect the wrong one more often than they'd admit.
- Build the post in the composer. Upload the finished vertical file, write the caption and hashtags, and choose the publishing time. Preview the crop, because composers sometimes render safe zones differently from TikTok.
- Set the time zone explicitly. Some workspaces schedule everything in one zone; others default to the account's zone. Decide which you want before the first batch, then confirm it in the tool's settings.
- Publish one test post before you batch a week. Check that it appears in the calendar and then lands on TikTok at the hour you expected. A mismatched connection or zone is the usual reason a slot goes missing.
Record the tool's lead time in your workflow notes. Some give you far more runway than the native 10 days and some give you less, and you don't want to discover the ceiling while planning a launch.
Test Posting Times Before You Commit to One
You lock a month of posts to one hour because a chart called it the winner, then a quieter slot on the same account beats it on watch time. That mismatch is normal. Published timing studies of TikTok do not land on one hour.
Some analyses point to late-afternoon and evening peaks. Hootsuite's timing study identifies Thursday morning, 7 to 11 a.m., as its strongest window and finds weak performance before 6 a.m. on several days and after 11 p.m. I would not copy either pattern onto an account without a test. Each sample can be right for the accounts inside it, and still be wrong for yours.
Run a three-cell test
Pick three comparable weekly slots and hold them for two to four weeks. A follower-active morning, a midweek afternoon, and a Sunday evening spreads the test without spending the whole week on experiments.
Hold topic, video length, hook style, and caption structure as steady as you can. A 12-second trend clip on Sunday against a 90-second explainer on Tuesday measures format, not the clock.
Score each cell on median views, average watch time, completion rate, shares, and follows per 1,000 impressions. Ignore a single raw-view spike. One sound that travels can make a weak hour look strong for months.
Start from your own best time to post on TikTok in TikTok analytics, so the morning cell sits when followers already scroll, and publish slightly ahead of that peak rather than on top of it. Keep output even across the test. A skipped week scrambles the comparison more than a slightly off hour does.
Once a post is on the calendar, leave the slot alone for the test window. Editing the caption, cover, or publish time after the first results land mixes a new variable into the hour you meant to measure.
A benchmark tells you where to start looking. Your own completion rate tells you where to stay.
Log each cell the same way every week:
| Slot | Posts | Next cycle |
|---|---|---|
| Tue 8 a.m. | 3 | Keep or cut |
| Wed 2 p.m. | 3 | Keep or cut |
| Sun 7 p.m. | 3 | Keep or cut |
After two to four weeks, keep the cell with the stronger median completion and follows, cut the weakest, and only then try a new hour.
Handle Time Zones and Posting Frequency
A schedule can be consistent and still miss its audience if it uses the wrong clock. Decide how often you can publish without weakening the videos, then set publishing times around where your viewers are.
A 2024 TikTok benchmark report from Rivaliq found brands averaged roughly 2 videos per week. Treat that as a reference point, not a target: choose a cadence you can maintain while keeping video quality steady. For more guidance on choosing a sustainable cadence, see how often to post on TikTok.
Time recommendations vary by sample. Sprout Social's analysis of 2 billion engagements across 307,000 profiles found Tuesday through Thursday, 2 to 6 p.m. local time performed best, according to Sprout Social's TikTok timing research. Use that window as a starting hypothesis, then test against your own account's results rather than copying it as a universal rule.
When your audience is split
If followers span North America, Europe, and Asia, a single posting time may suit one region better than the others. Compare one post at an overlap time with separate posts scheduled for regional audiences. Review engagement by region, and account for daylight-saving changes: a time that once matched a local viewing window may shift by an hour.
Set Your Schedule for the Next Two Weeks
Two weeks is enough to pick a method and come out with real data.
Week one. Choose one route from the comparison table, prepare the account, and schedule two or three posts inside the 10-day window. Finalize captions and covers before you confirm each one.
Week two. Fix three time slots, rotate them across your posts, and log median views, watch time and completion rate for each slot on the sheet from the timing test. Then decide the next move: keep the winning slot, add a fourth post, or move to automation if production is the bottleneck.
ClipCreator.ai generates and publishes video series on a schedule of 3 videos per week, one per day, or two per day, depending on the subscription, and the Starter plan at $19 USD per month covers three posts a week. Match your cadence to what the test can support rather than to a volume target someone else picked.
Before you confirm any batch, re-check the time zone on every post in it. That single habit prevents most of the failures in this guide. Then map the next month in a content calendar plan so the queue never runs dry.
Schedule your first batch before this week ends, and put the review date in your calendar now.
ClipCreator.ai connects your TikTok account, generates faceless videos from proven story templates or your own prompt, and publishes them on the days and times you choose, so the queue keeps filling while you focus on reading the test results. You can start at three posts a week and move up as your completion rate earns it. Visit ClipCreator.ai to compare the plans and set your publishing schedule.

Create your first video in under 2 minutes
Pick a niche, and ClipCreator.ai generates and auto-posts faceless videos to your channels every day.
Join ClipCreator.ai