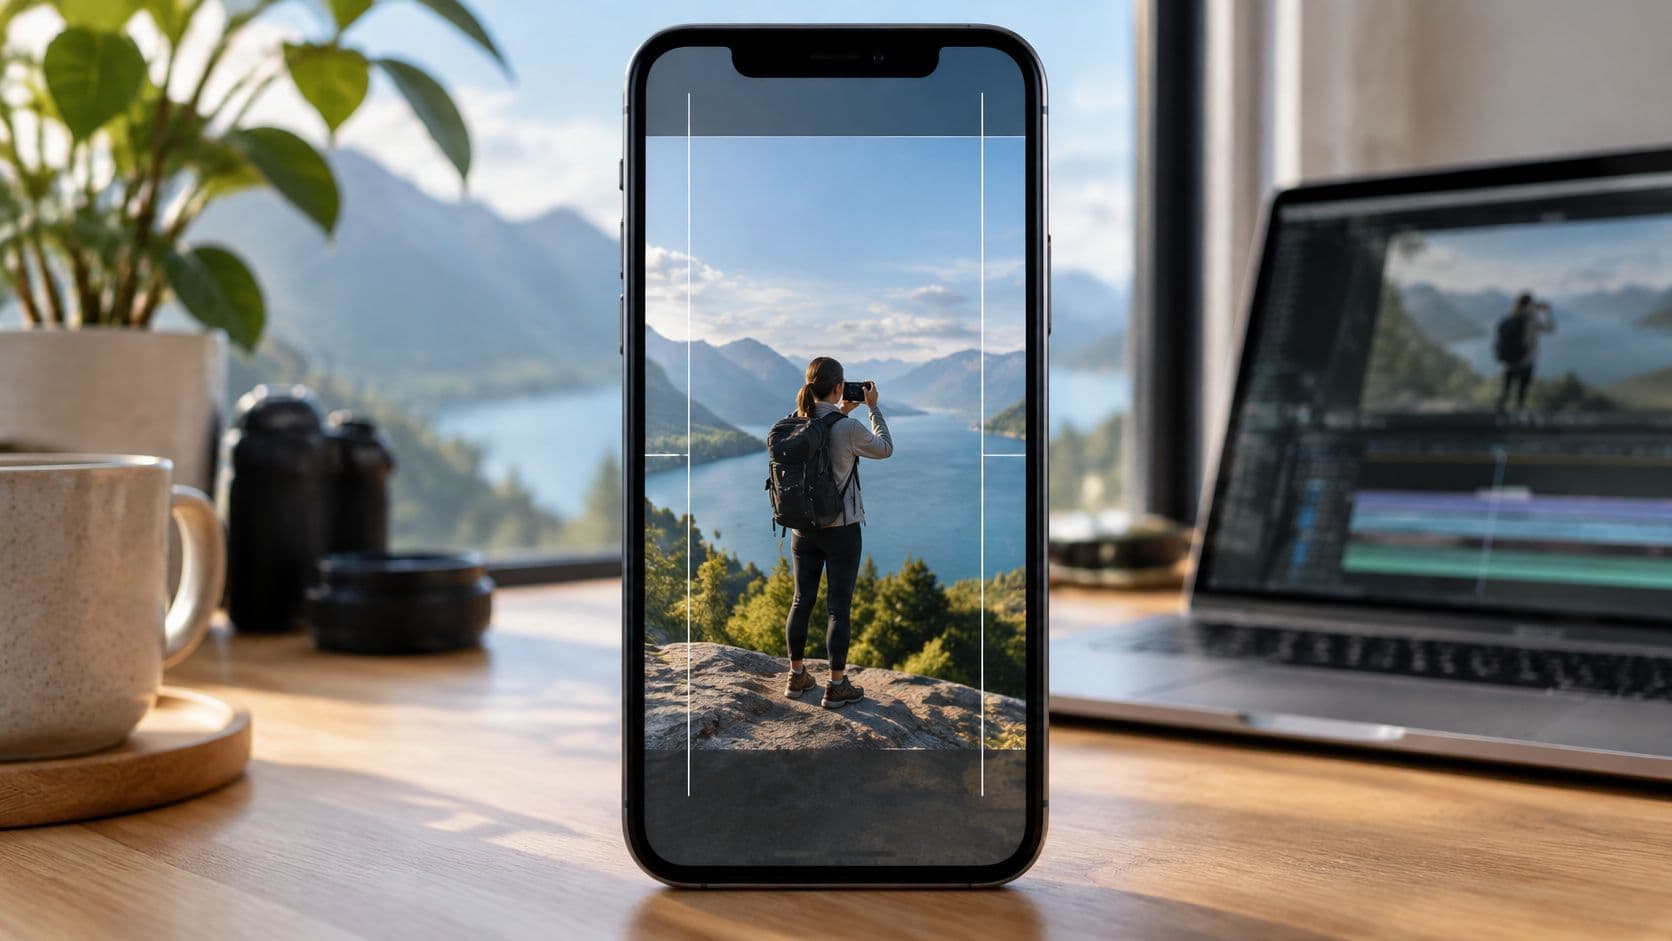
Export Instagram Reels at 1080 x 1920 pixels in 9:16 at 30 fps or higher. Instagram specifies a minimum resolution of 720 pixels and accepts aspect ratios from 1.91:1 wide through 9:16 tall vertical.
The practical difference is what viewers can see on their phones. A correctly sized file gives your subject room to fill the portrait viewing area, but it doesn't guarantee readable subtitles. Instagram still places controls over your video, so export dimensions and text placement need separate checks.
Reel Dimensions at a Glance
1080 x 1920 pixels is the practical export target for a full-height vertical Reel. Width comes first, height second. Reverse those fields in your editor and you'll export a horizontal video, even if the numbers look familiar.
Instagram's Reel size and aspect ratio guidance specifies an accepted aspect ratio range of 1.91:1 through 9:16, a minimum resolution of 720 pixels, and a minimum frame rate of 30 frames per second. For production, the recommended portrait canvas below gives you a straightforward working standard.
Instagram Reel specifications at a glance
| Specification | Value | What It Means |
|---|---|---|
| Aspect ratio (recommended) | 9:16 | A tall vertical frame designed to fill the portrait viewing area |
| Aspect ratio (accepted range) | 1.91:1 to 9:16 | Wider formats may display smaller or require cropping |
| Resolution (recommended) | 1080 x 1920 px | The standard portrait export target for Reels |
| Resolution (minimum) | 720 px | The platform minimum, not the preferred production target |
| Frame rate (minimum) | 30 fps | Set the final export to meet this minimum |
| Pixels per frame | 2,073,600 | Total pixels calculated from the recommended width and height |
Shape and detail are different settings
Aspect ratio describes the shape of the picture. Resolution describes how many pixels make up that picture. A video can have the correct tall shape but still look soft because its underlying image contains too little detail.
The total pixel count in the table describes the frame, not a quality guarantee. An out-of-focus shot won't become sharp just because you put it on a larger canvas. Likewise, a clean title can become difficult to read if you squeeze it into an overly compressed export.
Frame rate answers another question: how frequently the picture updates during playback. It doesn't control the width, height, or placement of your subject, so don't treat a higher frame rate as a fix for poor framing.
Build a reusable production preset
In Premiere Pro, DaVinci Resolve, or CapCut, save a portrait project preset and a matching export preset. Name them clearly enough that another editor can distinguish the working canvas from the delivery settings.
These requirements are platform-wide rather than market-specific. You don't need a different export size for each country, though phone proportions and interface layouts can affect the visible presentation. Use a consistent master file, then check its actual appearance in the app rather than assuming every device will display every edge identically.
Why Vertical 9:16 Fills the Screen
Hold your phone upright and compare its shape with a television. The phone gives you a tall viewing area; the television gives you a wide one. Put a wide shot into that tall area without cropping, and the subject becomes smaller because the entire width has to fit.
That trade-off matters more than the export label. A person demonstrating a product should be large enough for viewers to see their hands and the product together. If the shot sits in a horizontal strip, both may become difficult to follow.
The following sizes are illustrative canvases calculated from their aspect ratios, using a common width. They show the geometry, not separate platform recommendations.
Accepted Reel shapes and how much screen they fill
| Aspect Ratio | Pixel Size | How It Displays |
|---|---|---|
| 9:16 | 1080 x 1920 | Fills the intended portrait viewing area |
| 4:5 | 1080 x 1350 | Uses more height than a square, but leaves space above and below when fitted |
| 1:1 | 1080 x 1080 | Shows a square with unused space above and below |
| 1.91:1 | Approximately 1080 x 565 | Shows a narrow landscape strip when fitted without cropping |
Choose between preserving context and enlarging the subject
Say you're repurposing a widescreen YouTube interview. Keeping the entire frame preserves both speakers and the set, but each face looks smaller on a phone. Filling the portrait canvas makes a speaker easier to see, but cuts away the sides.
Neither choice is automatically wrong. Crop according to the information the viewer needs, not just the shape you want to fill.
For an interview, reposition the crop when the speaker changes. For a cooking demonstration, follow the hands and ingredients rather than automatically centering the person's face. If the whole scene is essential, build an intentional portrait layout around it instead of stretching the original image.
Practical rule: Reframe around the subject before adding bars. Keep a wider composition only when the surrounding detail helps viewers understand the action.
Subtitles burned into the original widescreen video need particular attention. Cropping can remove their first and last words, while shrinking the entire shot makes them harder to read. Replace those subtitles with text composed for the portrait version whenever the original project allows it.
How to Export a 1080 x 1920 Reel
Set the working canvas before you start arranging titles or trimming shots. An export preset can change the delivery file, but it can't make a wide composition work automatically in portrait.
Use this setup sequence to keep the editing canvas and the final output aligned.
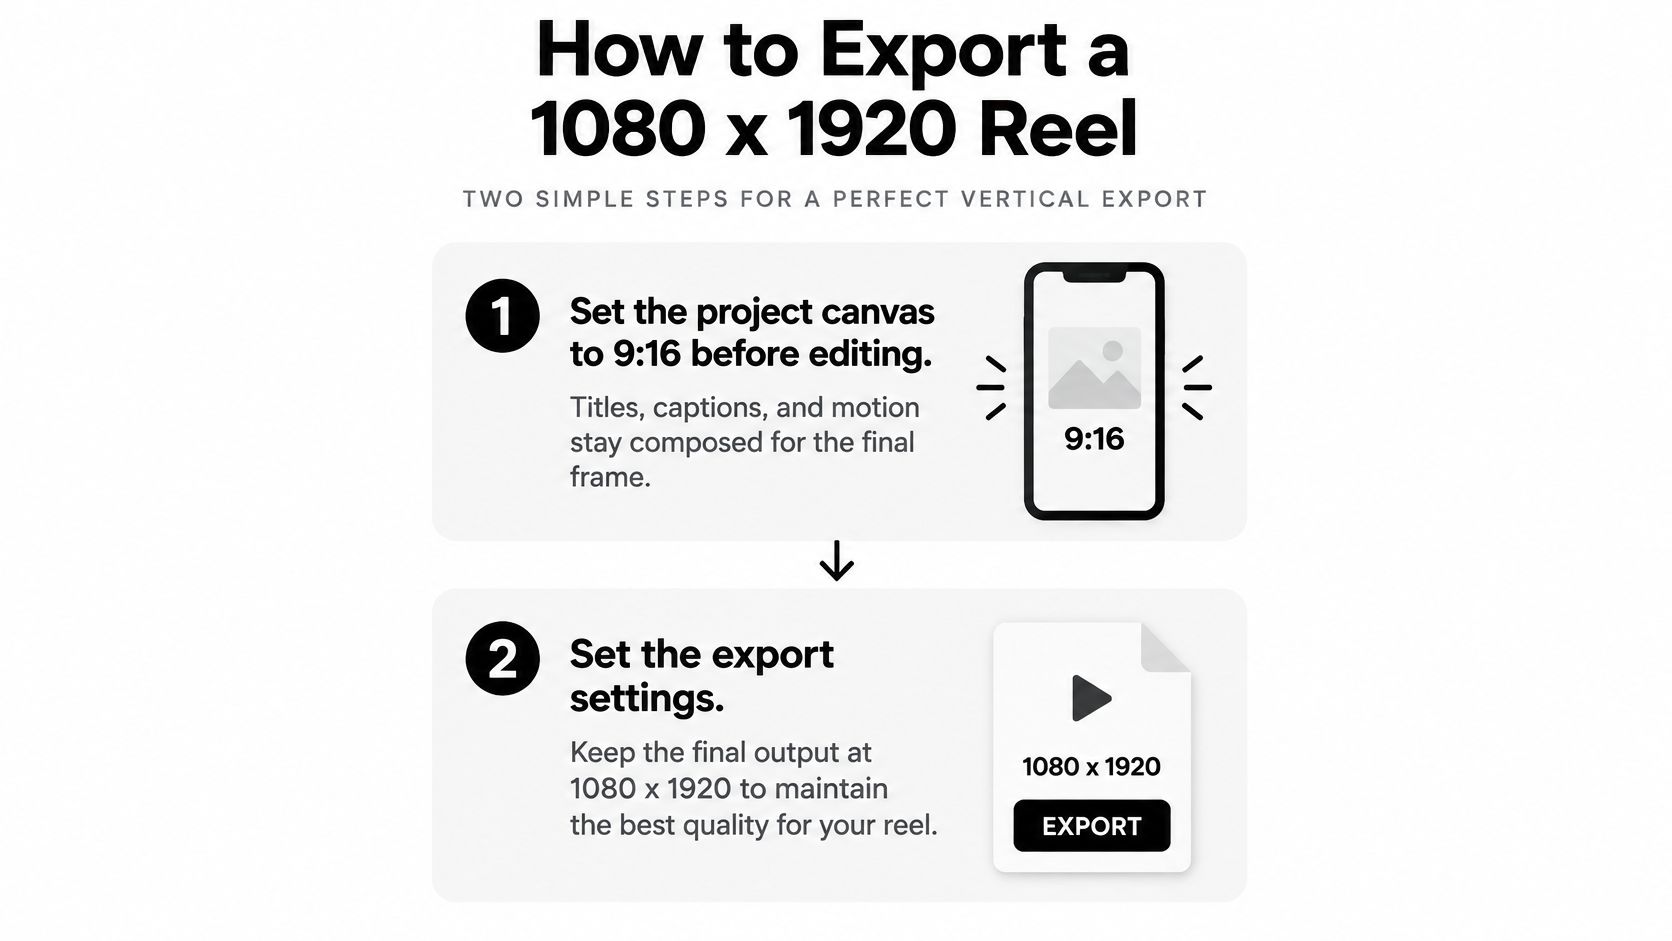
Set up the picture before encoding
- Create the portrait project first. In your editor's sequence, timeline, or canvas settings, select the vertical format established in the specification table. The common slip is letting the first imported clip determine the entire project's shape.
- Match the export dimensions to the canvas. Open the export panel and check both width and height rather than trusting a preset name such as Social or High Quality. A horizontal delivery preset can override an otherwise correct portrait timeline.
- Meet the frame-rate minimum without ignoring the source. Match a higher source rate when appropriate, and inspect any footage that needs conversion from a lower rate. Raising the export setting doesn't create genuine captured motion, and poorly chosen frame interpolation can produce judder or warped moving objects.
Choose a practical delivery format
- Use MP4 with H.264 video as your working delivery choice. MP4 is the file container, while H.264 is the video codec selected inside the export settings. Don't confuse changing a filename extension with encoding the video correctly.
- Choose AAC stereo audio. Listen to the exported file, especially where narration overlaps music, and check that neither channel disappears unexpectedly. The common mistake is checking the timeline mix but never listening to the encoded deliverable.
- Preview the actual export on a phone. Watch the opening title, the busiest shot, and every caption transition at normal viewing size. Don't approve a file solely from the editor's large desktop preview, where small text looks more readable than it will in someone's hand.
If you're outsourcing the edit, Moonb's guide to video editing companies can help you explore production support. Give any editor a delivery brief that includes portrait framing, editable captions, and a phone-preview approval stage, not just a request for an Instagram version.
For an additional visual walkthrough, use the video below alongside your own export panel.

A good export looks intentional: the subject occupies the portrait composition, circles remain round, text has clean edges, and captions don't jump unpredictably between positions. If the output looks wrong, return to the project rather than repeatedly converting the same compressed file through different tools.
Safe Areas Where Text Stays Visible
Instagram places its interface over your video so viewers can identify the account, read the post caption, and interact with the Reel. Those controls aren't empty space outside your composition. They can sit directly over words, faces, or product details.
That makes safe areas a layout decision, not an export setting. A video can meet the technical requirements perfectly while its main instruction disappears beneath an overlay.
Use this diagram as a placement guide, then verify your own composition in the app.
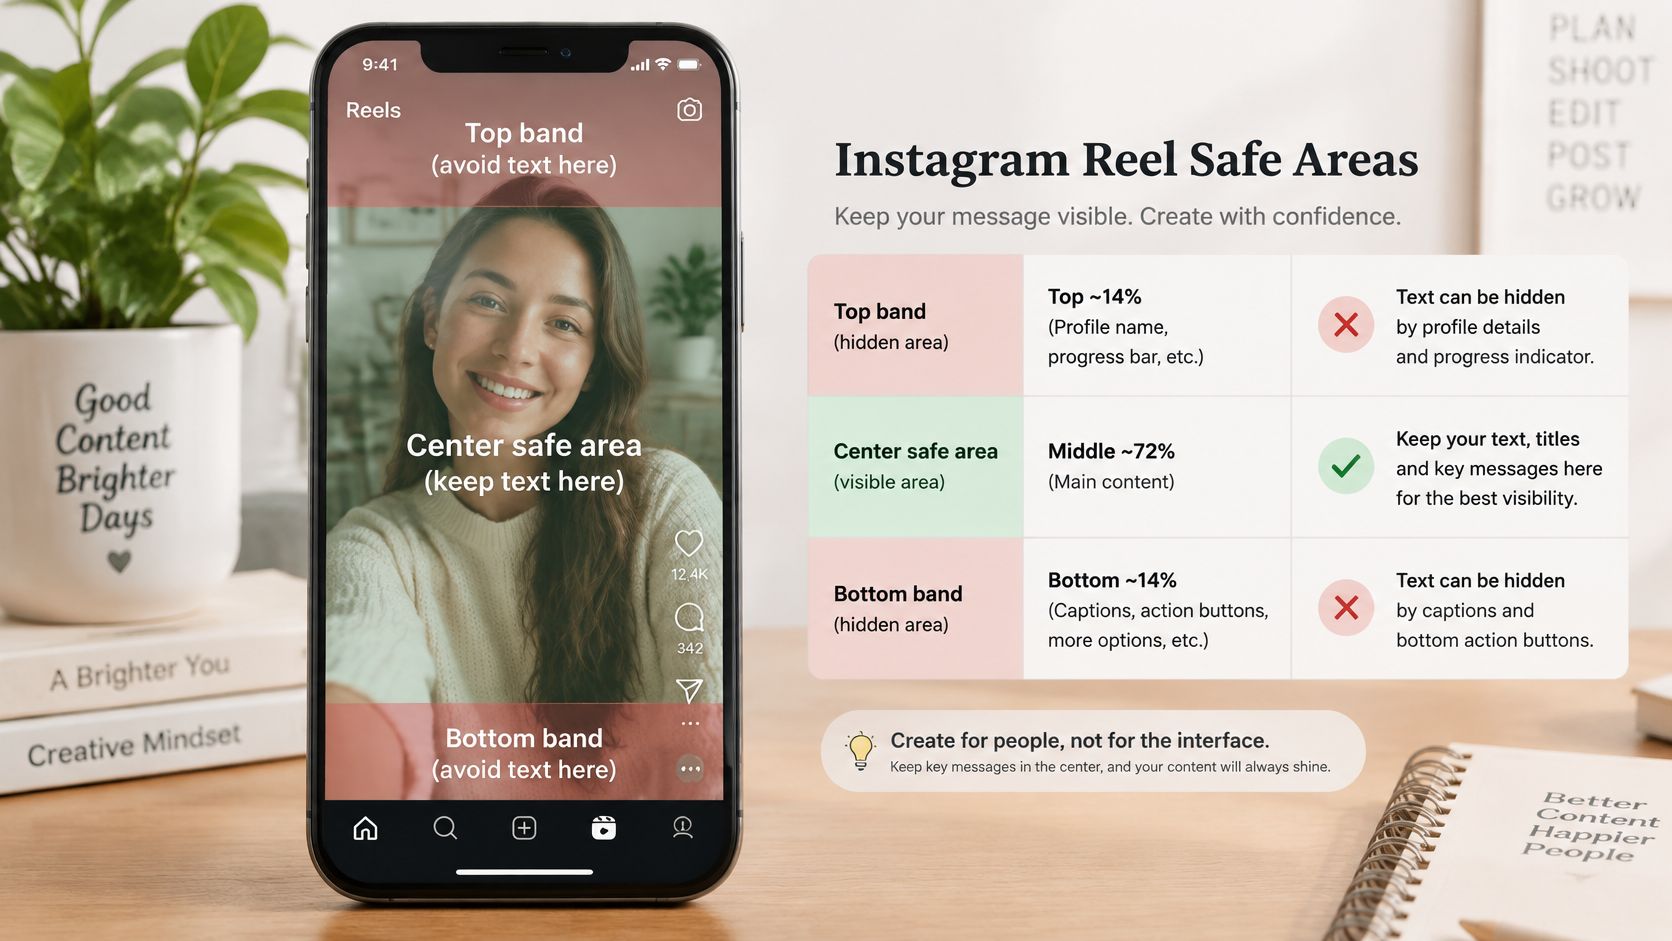
Treat the middle as a working area, not a guarantee
There isn't a verified fixed pixel boundary here that makes every title safe across every interface state. Avoid treating a generic overlay template as an official guarantee, especially when caption expansion or controls change what the viewer sees.
Reel safe areas on a 1080 x 1920 frame
| Frame Band | What Sits Over It | Place Here |
|---|---|---|
| Top band | Account details or viewing controls, depending on the view | Background and nonessential detail |
| Middle band | Usually less interface interference, but not guaranteed clear | Titles, subtitles, faces, and the main subject |
| Bottom band | Post caption, audio information, and nearby controls | Background rather than essential instructions |
| Side margins | Action controls, particularly toward the right, and possible display cropping | Keep key text inside the middle column |
A subtitle placed close to the bottom might look neatly aligned in your editor, then collide with the post caption during playback. Move the subtitle group upward, shorten long lines, and check that the new position doesn't cover the speaker's mouth or a demonstration.
Our guide to adding text to video can help you plan text layers before they're baked into the final file. Keep subtitles editable until you've approved their placement.
Leave the perimeter available for background. Put the information someone must read where their eyes can find it without competing with the app's controls.
Check the busiest moment
Don't judge safe placement from an empty opening frame. Preview the longest subtitle, a title appearing over a face, and the shot with the most important hand movement.
Use a test upload to inspect the composition with the actual interface visible. If a line only fits because it nearly touches a control, redesign it rather than relying on that narrow gap remaining unchanged.
Symptoms of Wrong Dimensions and How to Fix Them
Black bars above and below the picture usually mean the video is being fitted into a taller viewing area without filling it. Before you crop, establish whether the bars are part of the exported file or are being added by the player.
Open the file outside Instagram. If the bars are already visible, changing an upload setting won't remove them. You'll need to return to the timeline and adjust the layout.
Reel symptoms, causes and fixes
| Symptom | Likely Cause | Fix |
|---|---|---|
| Black bars above and below | Landscape or square picture fitted inside a portrait canvas | Re-edit the framing if bars are baked in; re-export if only the output preset is wrong |
| Stretched or squashed people | Unequal horizontal and vertical scaling | Re-edit with proportional scaling, then crop or reposition |
| Soft or blurry text | Undersized export, heavy compression, or text already flattened into a poor source | Re-export from the original project at the recommended size; re-edit if text needs rebuilding |
| Text cut off at the edges | Titles extend outside the usable picture or beneath interface elements | Re-edit text position and line breaks |
| Choppy motion | Low-frame-rate source, conversion problems, or uneven capture | Re-export for incorrect output settings; re-edit or replace problematic source footage |
| Upload rejected or low quality | File below the resolution minimum, an unsuitable encoding choice, or another upload issue | Re-export to the recommended delivery settings, then investigate any remaining error |
Separate framing mistakes from export mistakes
A re-export changes how the existing timeline is encoded. A re-edit changes what is inside the picture. That distinction prevents wasted attempts to fix a cut-off face by increasing export quality.
For a shape mismatch, follow a controlled video aspect ratio adjustment workflow. Keep proportional scaling enabled, enlarge the image only as needed, and reposition the crop around the action.
Troubleshooting shortcut: If people look distorted, fix scaling. If people look too small, fix composition. If the entire image looks soft, inspect the source and encoding.
Re-rendering at the recommended dimensions can fix an incorrectly sized deliverable, but it won't recover missing detail from a blurry source. For titles, the cleanest repair is often to rebuild them as editable text in the original project rather than enlarge a flattened copy.
Treat motion separately, too. A compliant export can still contain shaky capture, duplicated frames, or uneven movement. Watch a moving hand or camera pan before deciding that the frame-rate field alone has solved the problem.
Confirm Your Export Before You Upload
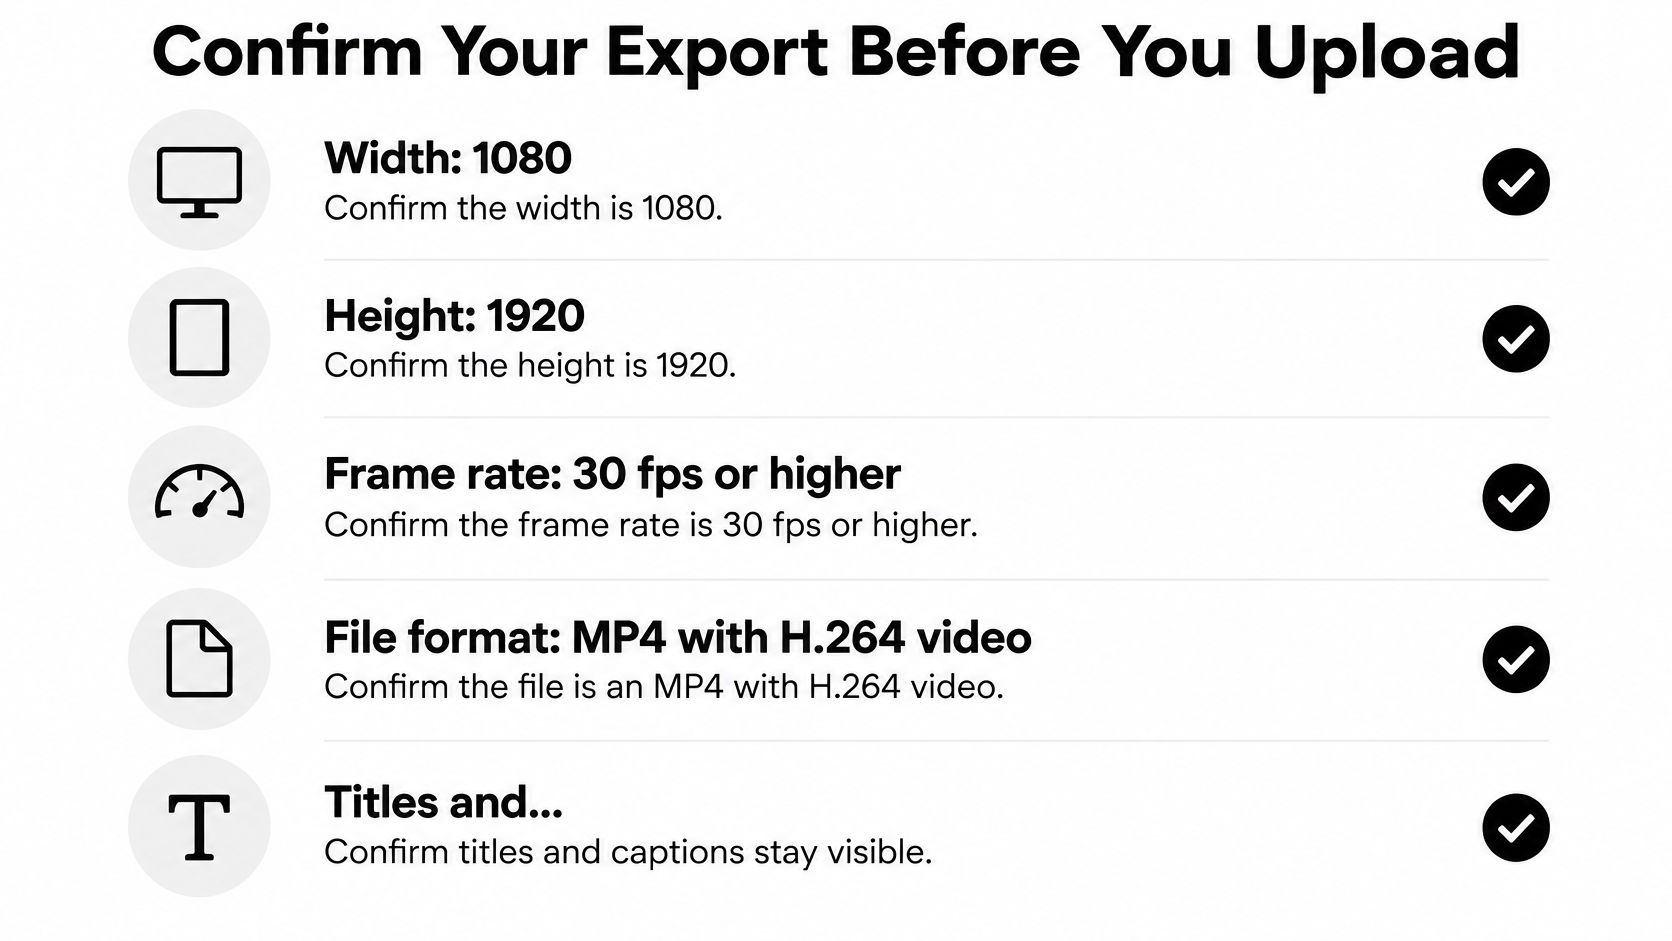
- Check width and height in the exported file. Use MediaInfo, your operating system's file properties, or your editor's media inspector to confirm the portrait dimensions match your delivery preset. Inspect the actual file, not just the project settings.
- Verify the frame rate. Confirm the file meets the platform minimum, then watch moving subjects for uneven playback. A metadata field tells you the encoded rate, not whether the original motion looks natural.
- Inspect the container and codec. Confirm your chosen delivery is an MP4 containing H.264 video. Play it outside the editing application and listen for missing audio or unexpected silence.
- Review every title and subtitle. Check the longest lines and the points where text changes position. Leave enough separation from interface elements that viewers don't have to work to read your message.
- Watch the full file on a phone. Don't stop after the opening shot. Check cropping, image clarity, caption timing, and the ending before following the video publishing workflow.
- Approve the checked file, then upload that version. Save it with a clear delivery filename so you don't publish an earlier draft by mistake. Export once with the recommended portrait dimensions and frame rate, verify the result, and post the file you've reviewed.
At ClipCreator.ai, we automate the creation of short, faceless videos with story-aligned images, voiceovers, and subtitles. Create your video, download the generated file, and run this phone-screen check before publishing it manually to Instagram.

Create your first video in under 2 minutes
Pick a niche, and ClipCreator.ai generates and auto-posts faceless videos to your channels every day.
Join ClipCreator.ai